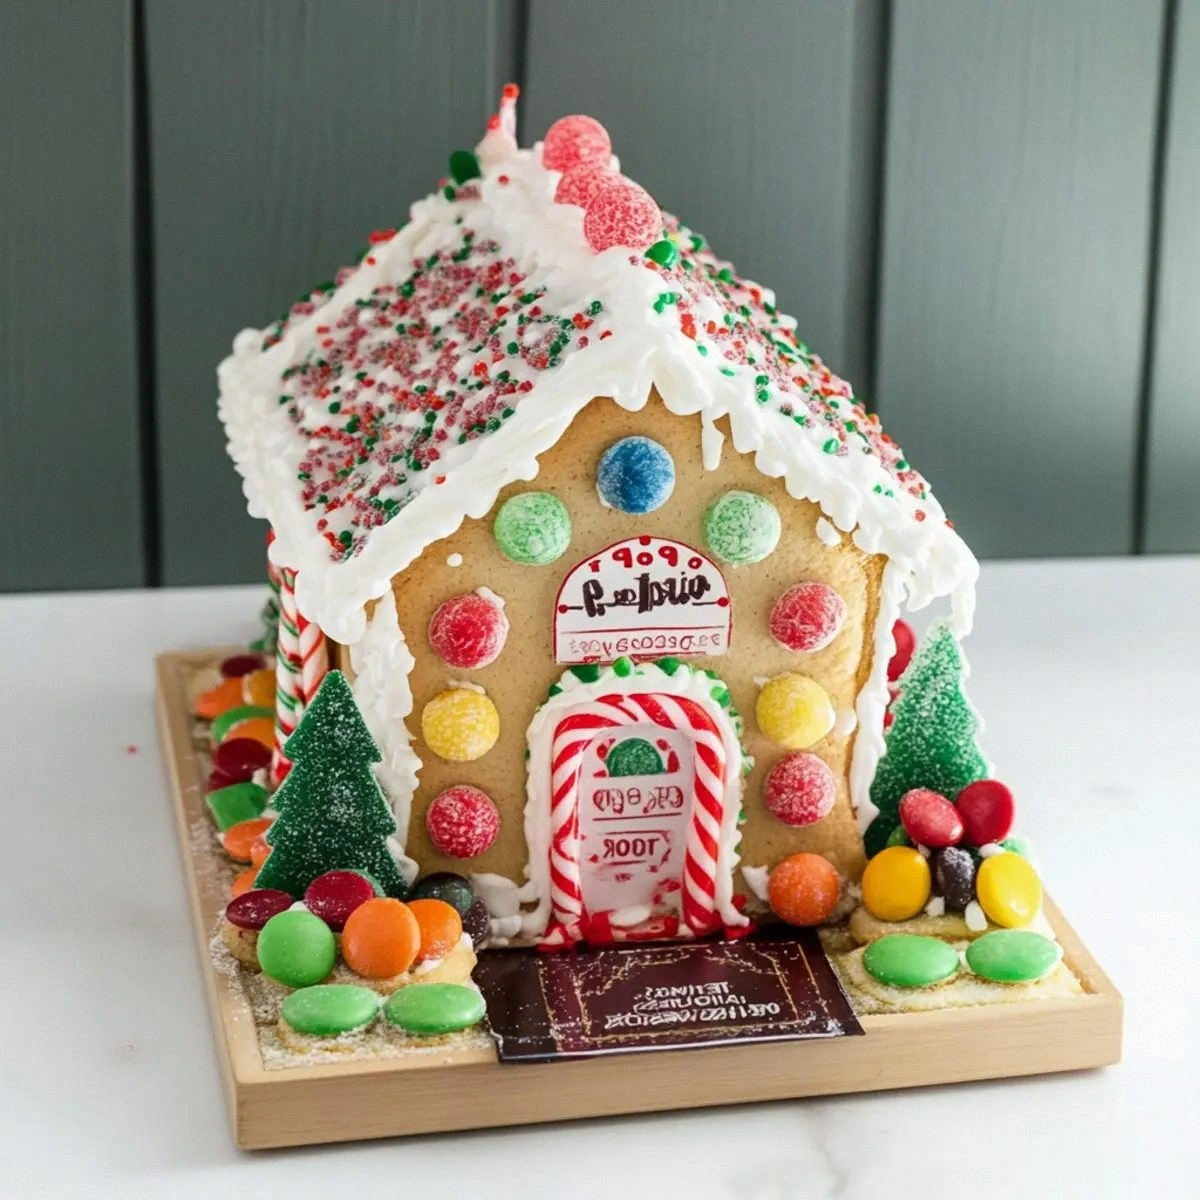
I was standing in my kitchen, half‑heartedly scrolling through TikTok, when a friend dared me to build a gingerbread house that didn’t involve any flour, butter, or that dreaded dough that sticks to every surface. I laughed, grabbed three strawberry‑filled Pop‑Tarts from the pantry, and thought, “If I can’t roll out dough, I’ll roll out the pastry itself.” The moment the toaster dinged, the sweet aroma of toasted strawberries hit me like a warm hug, and I realized I was about to create the most rebellious holiday treat ever. Most gingerbread houses are stiff, bland, and require a Ph.D. in pastry science; this one is a pop‑tart‑powered, candy‑splattered celebration that will make your taste buds do a jig.
Picture this: the kitchen humming with the sound of the oven fan, the air thick with the scent of caramelized sugar and a whisper of spice, and a glossy river of icing glistening like fresh‑fallen snow. The Pop‑Tarts, once crisp and buttery, become the sturdy walls of a house that looks like a candy‑cane castle, while the decorating icing acts as both mortar and snow‑drift. When you take the final masterpiece out of the oven, the whole room smells like a Christmas market on a crisp December evening, and you can practically hear sleigh bells in the background. I’ll be honest — I ate half the batch before anyone else got a chance to marvel at it, but that’s the point: it’s meant to be devoured as fast as you can build it.
Why does this version stand out? Because it takes the classic gingerbread house and throws out the grainy, crumbly base for something that’s instantly recognizable, instantly edible, and instantly Instagram‑worthy. The secret weapon? A tube of decorating icing that’s as thick as a cloud and as sweet as a first kiss under the mistletoe. I dare you to taste this and not go back for seconds; the combination of strawberry‑tart tang and sugary candy crunch is a flavor explosion that most traditional recipes simply can’t match. And there’s a twist you won’t see coming: a quick‑microwave melt of the icing that creates a glossy finish without any fiddly piping bags.
Let me walk you through every single step — by the end, you’ll wonder how you ever made a gingerbread house any other way. Okay, ready for the game‑changer? This next part? Pure magic. Stay with me here — this is worth it.
What Makes This Version Stand Out
- Taste: The strawberry pop‑tart filling adds a bright, fruity punch that cuts through the sugary icing, creating a balanced sweet‑and‑tart profile.
- Texture: The crisp Pop‑Tart crust holds up like a true gingerbread wall, while the candy toppings add a satisfying crunch that shatters like thin ice.
- Simplicity: No dough, no rolling pins, no endless waiting — you can have a fully assembled house in under an hour.
- Uniqueness: Using store‑bought pastries as structural elements is a bold claim that turns a classic holiday staple on its head.
- Crowd Reaction: Guests are instantly wowed, often asking “Did you bake this?” before you even get a chance to answer.
- Ingredient Quality: The bright strawberry flavor of the Pop‑Tarts pairs perfectly with the buttery, vanilla‑rich icing.
- Cooking Method: A quick bake at a low temperature ensures the Pop‑Tarts stay crisp without burning the icing.
- Make‑Ahead Potential: Assemble the house a day ahead, store it covered, and the flavors meld even more beautifully.
Alright, let's break down exactly what goes into this masterpiece...
Inside the Ingredient List
The Flavor Base
The star of the show is the 3 Strawberry Pop Tarts. Their jammy interior provides a juicy, slightly tart contrast to the sugary exterior, ensuring each bite isn’t just one‑dimensional sweetness. If you skip them, you’ll end up with a plain, bland house that looks great but tastes like a sugar cube. For a twist, try raspberry or cherry Pop‑Tarts, but beware: the flavor profile shifts dramatically and may overwhelm the icing.
The Texture Crew
Next up is the 1 tube Decorating Icing. This isn’t just any icing; it’s a thick, glossy concoction that acts like both mortar and snow. It holds the Pop‑Tart walls together while adding a creamy, buttery finish that melts in your mouth. If you’re out of pre‑made icing, you can whisk together powdered sugar, a splash of milk, and a dash of vanilla until you reach a pipeable consistency.
The Unexpected Star
Enter the assorted Christmas Candy. Think peppermints, red and green M&Ms, tiny chocolate stars, and candied orange peel. These pieces bring visual sparkle and a textural contrast that makes each bite feel like a mini‑celebration. Skipping the candy turns the house into a plain wall of frosting; you lose the festive crunch that makes it unforgettable. If you’re allergic to nuts, avoid any candy that contains them and substitute with nut‑free alternatives.
The Final Flourish
Finally, the optional Edible Glitter adds a subtle shimmer that catches the light like fresh snow under a streetlamp. It’s purely decorative, so you can leave it out if you prefer a matte finish. A little goes a long way; dust just enough to make the house sparkle without turning it into a glitter bomb.
Everything's prepped? Good. Let's get into the real action...
The Method — Step by Step
Preheat your oven to 300°F (150°C). While the oven warms, line a baking sheet with parchment paper; this prevents the Pop‑Tarts from sticking and makes cleanup a breeze. Place the three Pop‑Tarts on the sheet, spacing them apart so they don’t melt into each other. This is the moment of truth: you’ll hear a faint sizzle as the butter in the crust begins to melt, and the scent of strawberry will start to fill the kitchen. Watch the edges — they should begin to turn a light golden brown after about 8 minutes.
Watch Out: Do not let the Pop‑Tarts bake longer than 12 minutes or they’ll become soggy, ruining the structural integrity of your house.While the Pop‑Tarts are in the oven, give the decorating icing a quick 10‑second microwave blast. This makes it flow like molten glass, perfect for piping and bonding. Stir the warmed icing with a silicone spatula until it’s smooth and glossy; you’ll notice it becomes slightly translucent, which is exactly what you want for that “snow‑covered” look. If the icing looks too thick, add a drop of milk; if it’s too runny, sprinkle in a teaspoon of powdered sugar.
Remove the Pop‑Tarts from the oven and let them cool on a wire rack for 2‑3 minutes. This cooling window is crucial because the crust will firm up just enough to support the weight of the icing without cracking. Once cool, use a sharp kitchen shears to trim each Pop‑Tart into walls, roof, and door pieces. I recommend cutting two side walls, a front and back, a triangular roof, and a small rectangular door — think of it as building a mini‑skyscraper with pastry bricks.
Kitchen Hack: Place the trimmed pieces on a sheet of wax paper; the paper prevents the icing from sticking to the countertop while you work.Lay out the base wall pieces on a clean surface and start “gluing” them together with the warm icing. Apply a generous bead of icing along the edges where two pieces meet, then press firmly for about 10 seconds. You’ll hear a faint “pop” as the icing sets, a satisfying sound that tells you the bond is solid. Continue building up the walls, making sure each joint is even; uneven walls will cause the roof to tilt, and nobody wants a lopsided ginger‑house.
Now for the roof! Position the triangular roof pieces on top of the walls, using a thick line of icing as mortar. The roof should sit like a crown, with a slight overhang on each side to mimic a real gingerbread house. Press down gently, then use the back of a spoon to smooth the icing seams, creating a seamless snow‑capped look. If the roof feels wobbly, add a second line of icing underneath for extra support.
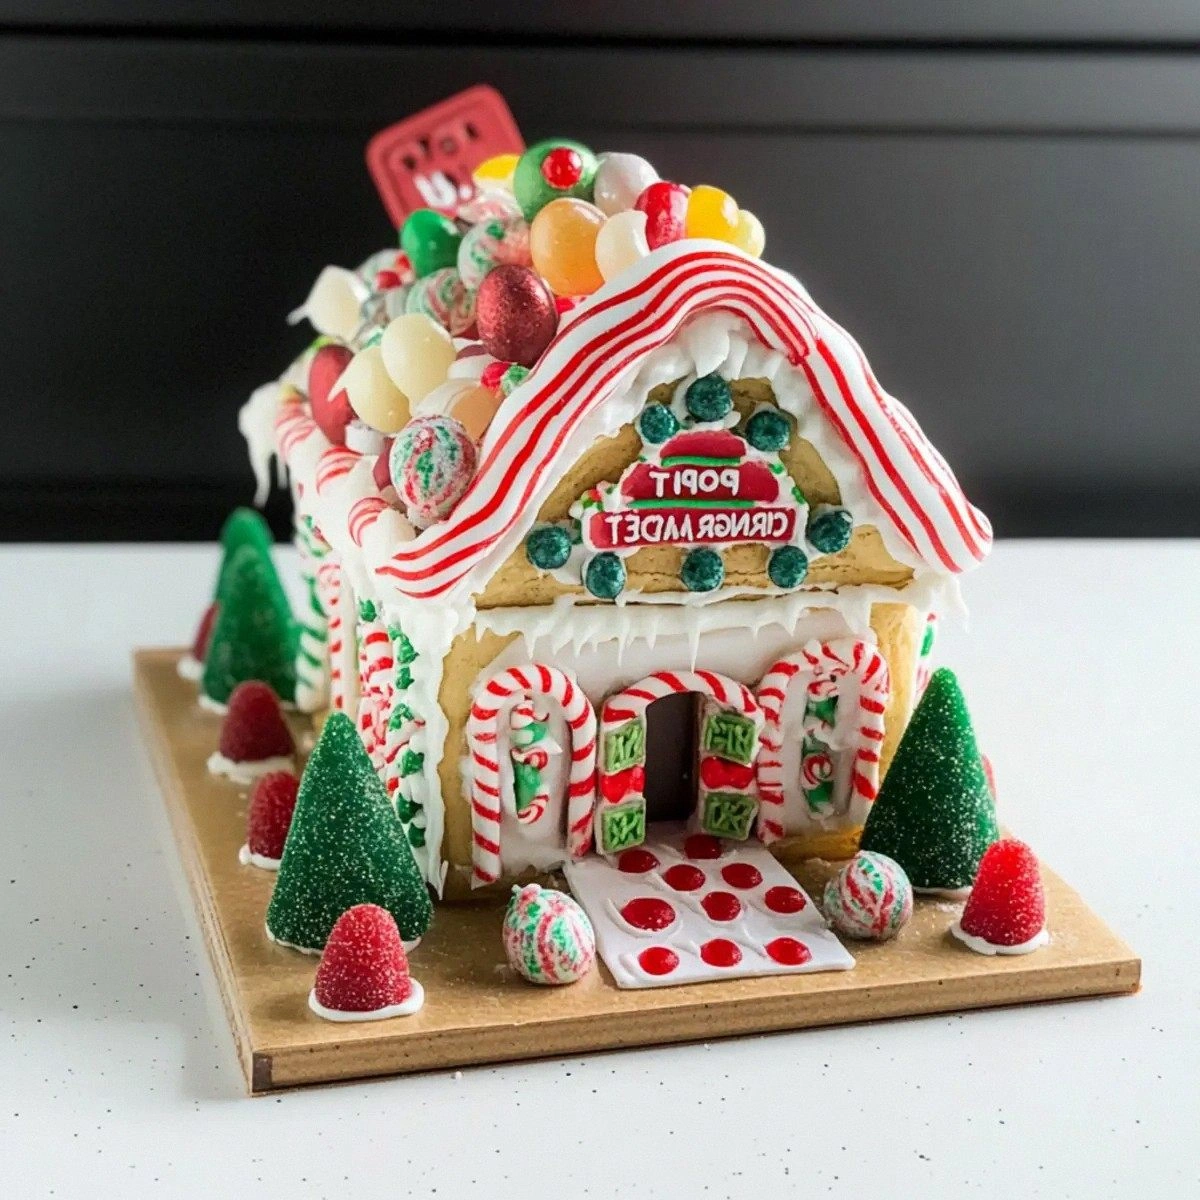
It’s time for the candy décor. Start with larger pieces like candy canes for the corners, then fill in gaps with smaller treats like M&Ms and chocolate stars. The icing acts as glue, so dip each candy piece lightly into the icing before placing it. This ensures they stay put even when the house is moved. As you work, picture the house lit up on a winter night — the candy should sparkle like festive lights.
If you’re using edible glitter, now’s the moment to dust it lightly over the roof and any exposed icing. Hold the glitter container about 12 inches away and give a gentle shake; you’ll see a fine sparkle settle like fresh snow. Remember, a little goes a long way — you want a subtle shimmer, not a glitter avalanche.
Let the assembled house sit at room temperature for 15‑20 minutes. This resting period lets the icing fully harden, turning the house into a sturdy, edible sculpture. While you wait, the kitchen will be filled with the lingering scent of toasted pastry and sweet candy, a reminder that you’ve just created something truly special. Once set, gently transfer the house to a serving platter, and admire your handiwork. That feeling when you see a fully built Pop‑Tart gingerbread house? Pure joy.
That's it — you did it. But hold on, I've got a few more tricks that'll take this to another level...
Insider Tricks for Flawless Results
The Temperature Rule Nobody Follows
Most home bakers set their ovens to 350°F for gingerbread, but that’s a recipe for soggy Pop‑Tarts. Keeping the temperature at a low 300°F ensures the pastry crisps without over‑cooking the icing. I once tried the higher heat and ended up with a house that collapsed like a sandcastle at high tide. Trust me, the gentle heat is the secret to a sturdy, crunchy wall.
Why Your Nose Knows Best
Don’t rely solely on timers; use your senses. When the Pop‑Tarts start to emit a buttery, caramelized aroma, you’re close to the perfect bake. If you smell a hint of burnt sugar, pull them out immediately. Your nose is a built‑in kitchen thermometer, and it’ll save you from a house that looks good but tastes like charcoal.
The 5‑Minute Rest That Changes Everything
After assembling, give the house a brief 5‑minute rest before adding the final candy decorations. This allows the icing to set just enough to hold the candy without sliding off. A friend once tried to decorate immediately, and the candy ended up sliding down the walls like a sugar avalanche. Patience at this stage is the difference between a masterpiece and a mess.
The Icing Warm‑Up Trick
If your icing hardens in the fridge, give it a quick 5‑second zap in the microwave before each use. This keeps it pliable and pipe‑ready, preventing cracks in the mortar. I’ve seen houses where the icing cracked like dried paint; a quick warm‑up saves you from that disaster.
The Candy Placement Blueprint
Start with a “foundation” of larger candy pieces at the base, then layer smaller pieces on top. This mimics real architectural design, where larger blocks support smaller ones. I once tried to sprinkle everything at once, and the house looked chaotic. A strategic layout not only looks prettier but also distributes weight evenly.
Creative Twists and Variations
This recipe is a playground. Here are some of my favorite ways to switch things up:
Chocolate‑Covered Pop‑Tart House
Dip each Pop‑Tart wall piece in melted dark chocolate before assembling. The chocolate adds a rich, bitter counterpoint to the sweet strawberry filling, creating a sophisticated flavor profile that adults love.
White‑Chocolate & Peppermint
Swap the strawberry Pop‑Tarts for vanilla ones, and use peppermint‑flavored icing. Add crushed candy canes for a festive, winter‑wonderland vibe that screams holiday cheer.
Nut‑Free & Gluten‑Free
Choose gluten‑free Pop‑Tarts (available in many stores) and a sugar‑free icing made from powdered erythritol. This version keeps all the fun while catering to dietary restrictions.
Miniature Pop‑Tart Village
Instead of one big house, create a cluster of tiny houses using mini Pop‑Tarts (cut them into smaller squares). Arrange them on a platter for a whimsical village that’s perfect for party platters.
Spiced Holiday Twist
Add a pinch of ground cinnamon and nutmeg to the icing before warming it. The warm spices deepen the flavor, making the house taste like a holiday hug.
Storing and Bringing It Back to Life
Fridge Storage
If you need to keep the house for more than a day, wrap it loosely in parchment paper and store it in an airtight container in the refrigerator. It will stay fresh for up to 3 days, and the icing will stay firm without getting soggy.
Freezer Friendly
For longer storage, freeze the assembled house (without delicate candy toppings) in a zip‑top bag. It can be frozen for up to 2 weeks. When you’re ready to serve, thaw it at room temperature for 30 minutes, then add fresh candy and a dusting of glitter.
Best Reheating Method
To revive the crispness, preheat your oven to 250°F (120°C) and warm the house for 5‑7 minutes. Add a tiny splash of water to a foil‑wrapped pan placed on a lower rack; the steam will soften the icing just enough to bring back that fresh‑out‑of‑the‑oven feel without melting the candy.