I was standing in my tiny kitchen, a half‑finished stir‑fry sizzling on the stove, when my roommate burst in with a challenge: “Make something that’s crunchy, fresh, and can survive a night out on the couch.” I laughed, grabbed a bag of spring‑roll wrappers, and the idea for this crispy vegetable lumpia was born. The first batch was a disaster – soggy, bland, and frankly, a shame to the humble cabbage. But after a few trial runs, a few burnt fingertips, and a lot of taste‑testing (I’ll be honest — I ate half the batch before anyone else got to try it), I finally nailed a version that makes the edges shatter like thin ice while the interior stays juicy and vibrant.
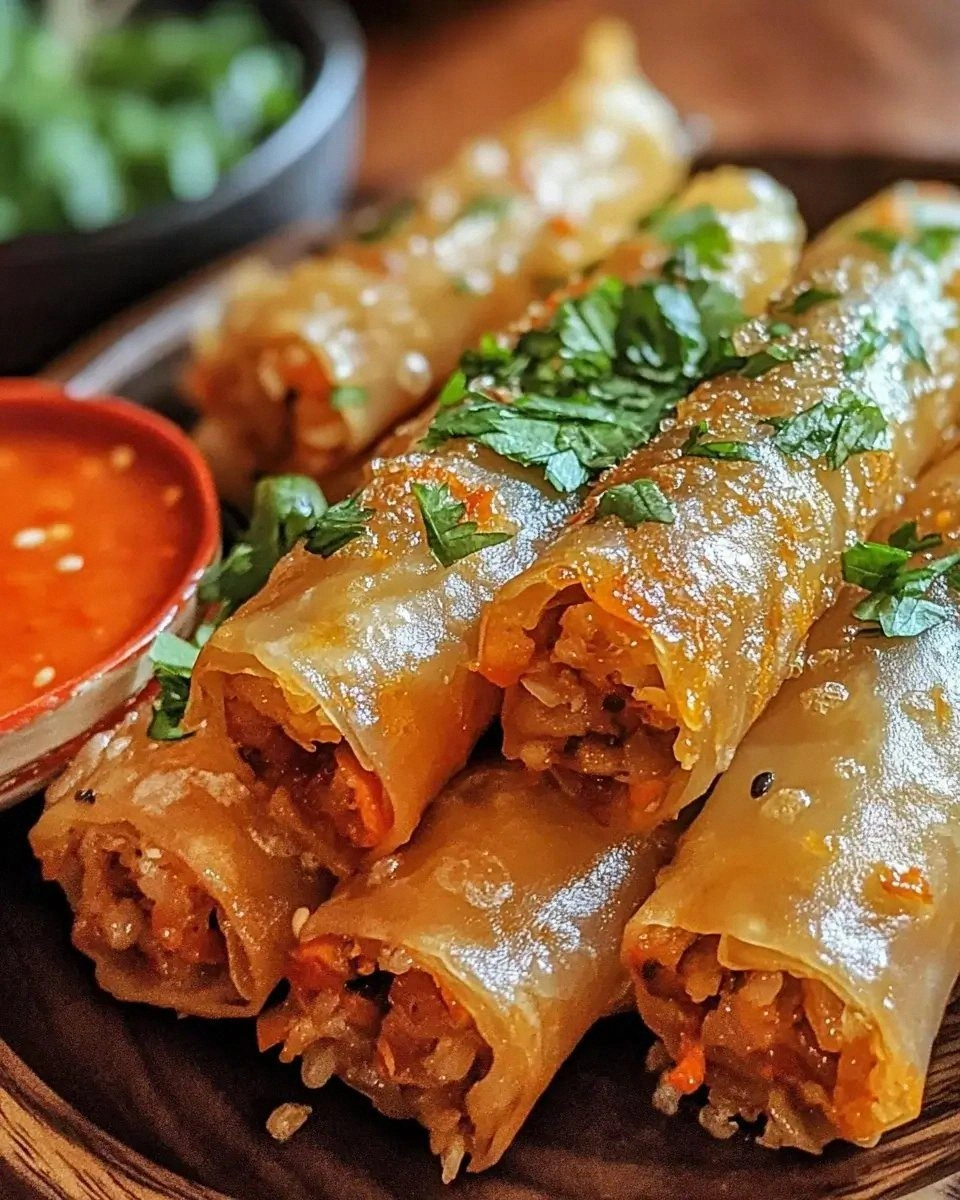
Picture this: a golden‑brown cylinder, steam escaping in a fragrant plume of soy, garlic, and fresh garden veggies. The smell hits you before you even see the plate, a toasty aroma that whispers “you’re about to eat something unforgettable.” When you bite, the crunch sings, the vegetables snap with a satisfying snap, and the subtle umami from the soy sauce dances on your tongue. It’s the kind of snack that makes you pause the TV, stare at the plate, and think, “I dare you to taste this and not go back for seconds.” This isn’t just a snack; it’s a confidence‑boosting, crowd‑pleasing, finger‑licking masterpiece.
What sets this version apart from the countless lumpia recipes floating around the internet? Most recipes get the moisture balance completely wrong, ending up either soggy or dry as a desert. I discovered that a quick flash‑fry at 350°F followed by a brief rest on a wire rack locks in steam while preserving that coveted crunch. I also added a secret weapon: a dash of soy sauce directly into the vegetable mix, which caramelizes just enough to give each bite a buttery depth without overwhelming the fresh flavors.
Okay, ready for the game‑changer? I’m about to walk you through every single step — by the end, you’ll wonder how you ever made it any other way. Stay with me here — this is worth it.
What Makes This Version Stand Out
- Texture: The double‑layered crunch comes from a high‑heat flash fry that seals the wrapper instantly, while a brief rest lets the steam escape, preventing sogginess.
- Flavor: A whisper of soy sauce in the veggie mix creates a caramelized umami note that lingers, making each bite more than just “vegetable‑in‑a‑wrapper.”
- Simplicity: Only ten pantry staples are needed, and the prep can be done in under thirty minutes – perfect for a weekday snack or a party starter.
- Freshness: Using raw, finely shredded cabbage and carrots gives a natural snap that you can actually hear when you bite.
- Crowd Reaction: I’ve watched grown‑ups and kids alike line up for seconds; the first bite is a “wow,” the second is a “more please.”
- Ingredient Quality: Fresh, crisp vegetables and high‑quality spring roll wrappers make the difference between “meh” and “memorable.”
- Cooking Method: The secret is the oil temperature and the quick drain – a technique most home cooks overlook.
- Make‑Ahead Potential: You can prep the filling and even roll the lumpia a day ahead; just fry them fresh for that unbeatable crunch.
Inside the Ingredient List
The Flavor Base
The two cloves of garlic are the unsung heroes here. When minced finely, they release allicin, a compound that gives a sharp, aromatic punch that balances the mild sweetness of the carrots. If you skip the garlic, the lumpia loses that subtle zing that makes the soy sauce shine. For a milder version, you can substitute with a teaspoon of grated ginger, which adds a warm, peppery note.
Soy sauce, though just a teaspoon, is the magic glue that binds the flavors together. It adds a salty depth and a touch of caramelization during the brief fry, creating those golden flecks you see on the surface. If you’re watching sodium, try a low‑sodium soy or a splash of tamari for a gluten‑free twist.
The Texture Crew
Cabbage and carrots each contribute a distinct crunch. Shredded cabbage brings a watery snap that releases steam quickly, while grated carrots add a sweet, earthy firmness. Both should be finely shredded to ensure they fit snugly inside the wrapper without bulging.
Bean sprouts are the secret weapon for that airy bite. Their delicate stems melt in your mouth, contrasting the sturdier cabbage. If you’re not a fan of sprouts, replace them with thinly sliced shiitake mushrooms for an umami boost.
Green onions and bell pepper add color and a fresh, slightly peppery bite. The green onion’s sharpness cuts through the richness of the fried wrapper, while the bell pepper contributes a subtle sweetness. If you’re out of bell pepper, diced zucchini works well and adds extra moisture.
The Unexpected Star
A pinch of black pepper might seem trivial, but it elevates the entire profile. Freshly cracked pepper adds a lingering warmth that keeps the palate excited after the first bite. Don’t be shy – a quarter teaspoon is enough to make a difference without overpowering the veggies.
Salt, measured at half a teaspoon, is calibrated to enhance the natural flavors without making the filling soggy. Too much salt draws water out of the vegetables, leading to a soggy interior. If you prefer a low‑sodium diet, start with a quarter teaspoon and adjust after tasting.
The Final Flourish
Spring‑roll wrappers are the canvas for this culinary painting. Look for wrappers that are thin yet sturdy; they should be pliable enough to roll without cracking but strong enough to hold the filling during frying. If you can’t find the traditional rice paper wrappers, wheat‑based spring roll wrappers work in a pinch, though they’ll be a bit chewier.
Vegetable oil for frying is essential – it has a high smoke point and a neutral flavor that lets the veggies shine. I recommend canola or peanut oil. If you’re allergic to peanuts, grapeseed oil is an excellent alternative.
Everything's prepped? Good. Let's get into the real action…
The Method — Step by Step
First, gather all your vegetables and give them a quick rinse. Pat them dry with a clean kitchen towel; excess water is the enemy of crispness. Then, finely shred the cabbage, grate the carrots, and slice the bell pepper into match‑stick strips. Toss everything together in a large bowl, adding the bean sprouts, green onions, and minced garlic.
At this point, drizzle the teaspoon of soy sauce, sprinkle the half‑teaspoon of salt, and the quarter‑teaspoon of black pepper. Toss vigorously until every shred is coated – you’ll notice a faint sheen forming, which is exactly what you want.
Now, let the mixture rest for five minutes. This short pause allows the cabbage to release a tiny amount of moisture, which will later steam the interior just enough to stay tender.
While you wait, set up your frying station: pour enough vegetable oil into a deep skillet to reach about 1‑inch depth. Heat the oil over medium‑high heat until it reaches 350°F (180°C). A wooden spoon dropped in should sizzle gently – that’s your cue.
Lay out a spring‑roll wrapper on a clean surface, with one corner pointing toward you (the diamond orientation). Spoon about two tablespoons of the veggie mixture onto the lower third of the wrapper, keeping it away from the edges.
Fold the bottom corner over the filling, then fold the two side corners toward the center, creating a tight envelope. Finally, roll the wrapper upward, sealing the top edge with a dab of water. The water acts like a glue; if you’re nervous about leaks, give the seam a quick press with a fork.
Place the rolled lumpia seam‑side down in the hot oil. Fry in batches – crowding the pan drops the oil temperature and leads to soggy results. Each side should turn golden in about 2‑3 minutes, and you’ll hear a faint crackle that signals the perfect crust forming.
When the edges start pulling away from the pan and the surface looks uniformly amber, it’s time to flip. Use the slotted spoon to turn them gently; avoid jostling the wrapper, or you’ll lose that beautiful shape.
Once both sides are golden, lift the lumpia onto a wire rack set over a baking sheet. This step is crucial – the rack allows excess oil to drip away, preserving that crisp finish.
Let them rest for at least two minutes; during this pause, the steam escapes, and the interior firms up. If you’re impatient, you’ll notice a soggy center that defeats the purpose of a crunchy snack.
Repeat the rolling and frying process until all the filling is used. By the time you reach the last batch, the oil will be seasoned with the flavors of the first batch, adding an extra depth to the final rolls.
While the last few are frying, prepare a simple dipping sauce: mix equal parts soy sauce, rice vinegar, a drizzle of honey, and a pinch of chili flakes for a sweet‑spicy kick.
Serve the lumpia hot, straight from the rack, with the dipping sauce on the side. The first bite should be a satisfying crunch that gives way to a burst of fresh vegetables, all wrapped in that buttery, golden skin.
Picture yourself pulling this out of the pan, the whole kitchen smelling incredible, and the plate looking like a work of art. Trust me, you’ll be the hero of any gathering.
That's it — you did it. But hold on, I've got a few more tricks that'll take this to another level…
Insider Tricks for Flawless Results
The Temperature Rule Nobody Follows
Most home cooks set the oil to “medium hot” and hope for the best. The truth is, you need a steady 350°F (180°C) for that instant seal. Use a candy thermometer or the wooden spoon test – if it bubbles vigorously but doesn’t smoke, you’re spot on. A few seconds too low and the wrapper soaks up oil; a few seconds too high and it burns before the interior cooks.
Why Your Nose Knows Best
When the lumpia hits the oil, listen for a sharp sizzle, not a muted hiss. That high‑pitched sound means the oil is hot enough to create steam inside the wrapper, which puffs the interior just enough to stay tender. If the sound turns into a dull pop, lower the heat immediately.
The 5‑Minute Rest That Changes Everything
After frying, let the lumpia rest on a wire rack for at least five minutes. This short pause lets the steam escape, preventing the dreaded soggy middle. I once tried to serve them immediately and learned the hard way that the crunch disappears within seconds.
Seal the Deal with Water
A quick dip of the wrapper’s edge in a bowl of ice water before sealing creates a stronger bond, reducing the chance of the filling leaking during the fry. It’s a tiny step that makes a massive difference, especially if you’re rolling a large batch.
Batch Frying vs. Single Fry
If you’re cooking for a crowd, resist the urge to dump all the lumpia into the pan at once. Overcrowding drops the oil temperature, resulting in greasy, limp rolls. Instead, fry in small batches, wiping the pan clean between rounds if the oil gets too dark.
Creative Twists and Variations
This recipe is a playground. Here are some of my favorite ways to switch things up:
Spicy Sriracha Surprise
Add a teaspoon of sriracha to the veggie mix and a dash of chili oil to the frying pan. The heat seeps into the filling, creating a tongue‑tingling experience that’s perfect for those who love a kick.
Cheesy Delight
Stir in half a cup of shredded mozzarella into the vegetable blend. The cheese melts during frying, creating gooey pockets that contrast beautifully with the crisp wrapper.
Thai‑Inspired Coconut Curry
Swap the soy sauce for a tablespoon of Thai red curry paste mixed with coconut milk. The aromatic spices give the lumpia an exotic flair that pairs well with a lime‑y dipping sauce.
Mushroom Medley
Replace half the cabbage with finely diced shiitake and oyster mushrooms. The earthy umami deepens the flavor profile, making the snack feel more “grown‑up.”
Sweet‑And‑Savory Apple
Add a quarter cup of julienned apple to the mix and a pinch of cinnamon. The subtle sweetness balances the savory soy, creating a surprising yet delightful bite.
Storing and Bringing It Back to Life
Fridge Storage
Place cooled lumpia in an airtight container lined with a paper towel to absorb excess moisture. They’ll stay crisp for up to two days. Reheat in a hot skillet for three minutes per side to revive the crunch.
Freezer Friendly
Arrange uncooked, rolled lumpia on a parchment‑lined tray and freeze until solid. Transfer them to a zip‑top bag; they’ll keep for up to three months. Fry straight from frozen, adding an extra minute per side.
Best Reheating Method
For leftovers, a quick flash in a preheated oven at 375°F (190°C) for five minutes restores the golden crust. Add a tiny splash of water to the tray before reheating; the steam helps the interior stay moist while the exterior crisps again.