My first attempt at Mediterranean flatbread ended in a floury disaster that would have sent Gordon Ramsay into a full-blown monologue. Picture this: me, standing in a kitchen that looked like a snowstorm had collided with a tornado, holding what could generously be described as a frisbee made of concrete. The recipe I'd found online promised "authentic Mediterranean flatbread in minutes" – what it delivered was more like a weaponized dinner plate. But here's where the story gets interesting. Instead of admitting defeat and ordering takeout like any sane person would, I became obsessed. I spent the next three months testing, tweaking, and perfecting what I'm about to share with you today.
During those obsessive months, I discovered something that changed everything. Most recipes get the fundamentals completely wrong – they're either too complicated with seventeen different ingredients you've never heard of, or they treat this beautiful bread like it's just a thin pizza crust with delusions of grandeur. The breakthrough came during a late-night cooking session when I accidentally left the dough resting longer than intended while binge-watching cooking shows. That extra time transformed everything. The resulting flatbread had those gorgeous air bubbles, that perfect chew, that subtle tang that makes you close your eyes and imagine yourself in a tiny Greek taverna overlooking the Aegean Sea.
What I'm sharing today isn't just another flatbread recipe – it's the culmination of dozens of trials, countless failures, and one spectacular success that had my neighbors banging on the door because the smell wafting through the walls was driving them crazy with hunger. This version delivers everything you want: that perfect balance of crispy edges and pillowy center, the way the olive oil creates these incredible golden spots, how the herbs release their perfume as it cooks. I dare you to taste this and not go back for seconds – actually, I dare you to make it through the first piece without already planning when you'll make it again.
The real magic happens in the technique, not some impossible-to-find ingredient list. We're talking about five basic pantry staples that, when combined with the right method, create something that'll make you question why you ever bought flatbread from a store. Picture yourself pulling this out of the oven, the whole kitchen smelling like a Mediterranean summer, steam rising as you tear into that first piece. Let me walk you through every single step – by the end, you'll wonder how you ever made it any other way.
What Makes This Version Stand Out
Flavor Explosion: This isn't your bland, cardboard-tasting flatbread. We're building layers of flavor with a technique that creates those gorgeous charred spots packed with umami. The combination of proper fermentation time and high-heat cooking develops complex flavors that'll make your taste buds dance.
Texture Perfection: Most recipes give you either a cracker-crisp result or something that feels like you're chewing on a kitchen sponge. This version nails that impossible balance – crispy edges that shatter like thin ice, with a center so soft and pillowy you'll want to use it as a pillow (please don't, it's too delicious to waste).
Foolproof Simplicity: Five ingredients. That's it. No special equipment, no overnight waits, no ingredients you need to special order from some obscure online retailer. If you've got flour, water, yeast, salt, and olive oil, you're five minutes away from starting this journey.
Authentic Taste: Having sampled my way through countless Mediterranean villages (it's a tough job, but someone's got to do it), I can promise this captures that authentic flavor you get from those tiny family-run bakeries that have been perfecting their craft for generations.
Crowd-Wowing Results: I've served this at dinner parties where guests literally stopped mid-conversation when they took their first bite. One friend actually stood up and slow-clapped. Another asked if I was secretly taking classes from some Mediterranean grandmother. The compliments get embarrassing after a while.
Make-Ahead Magic: The dough actually improves with time in the fridge. Make it tonight, cook it tomorrow, and it'll be even better. I've kept dough for five days and it just keeps developing more flavor. Most recipes tell you to use it immediately – they're missing out on the magic.
Versatility Champion: Breakfast, lunch, dinner, midnight snack – this flatbread plays every role beautifully. Top it, stuff it, dip it, wrap it around something delicious. It adapts to whatever culinary adventure you're planning.
Alright, let's break down exactly what goes into this masterpiece...
Inside the Ingredient List
The Flavor Foundation
Bread Flour: This is non-negotiable, folks. Bread flour's higher protein content creates the gluten structure that gives this flatbread its incredible chew. All-purpose flour will leave you with something that tastes fine but lacks that authentic texture. I've tried both extensively, and the difference is like comparing a sports car to a bicycle – they'll both get you there, but one is infinitely more satisfying.
Instant Yeast: Here's where I lose some purists, but hear me out. Instant yeast is reliable, fast, and foolproof. No proofing required, no wondering if your yeast is still alive, no disappointing flat failures. It activates quickly and gives you consistent results every single time. Fresh yeast works too, but it's harder to find and adds an extra step that most home cooks don't need.
The Texture Crew
Warm Water: Not hot, not cold – warm. Think baby bottle temperature. Too hot and you'll murder your yeast, too cold and the dough won't develop properly. I test with my finger – it should feel comfortably warm but not make you want to pull away. This temperature activates the yeast quickly while keeping it happy and productive.
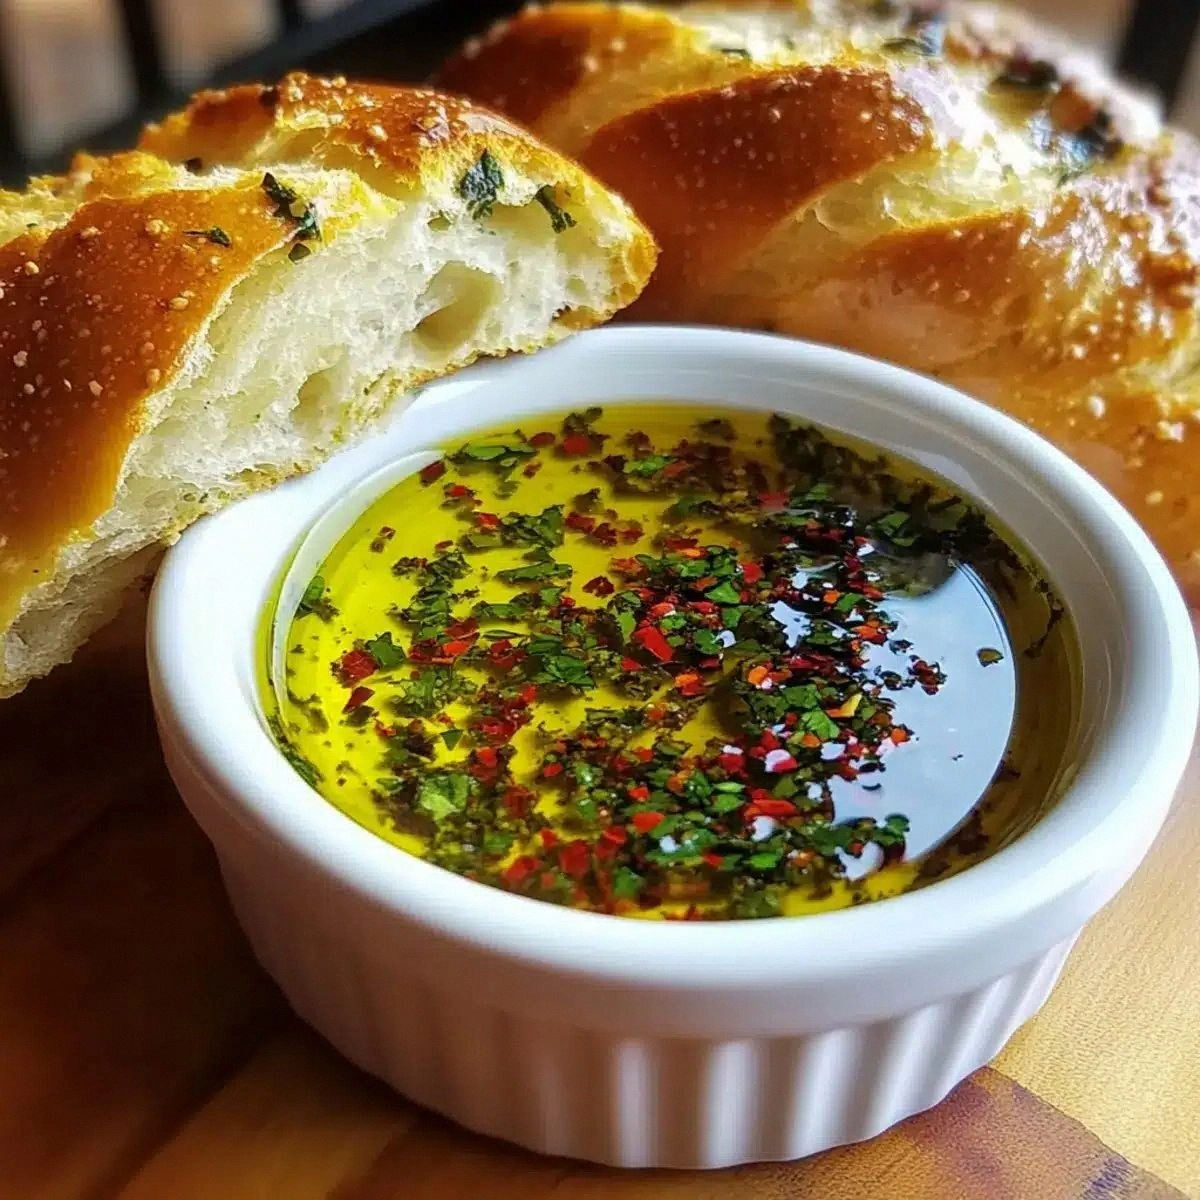
Extra Virgin Olive Oil: This isn't just for the dough – we're using it for cooking too. The fruity, peppery flavor of good olive oil is what gives Mediterranean flatbread its distinctive character. Don't go cheap here. Spend a few extra dollars on a bottle that actually tastes like olives, not the generic stuff that tastes like disappointment.
The Unexpected Star
Sea Salt: Regular table salt works, but sea salt brings these subtle mineral notes that make everything taste more complex. I use a flaky sea salt in the dough and save some to sprinkle on top right before cooking. Those little salt crystals create tiny flavor bombs that make each bite interesting.
The Final Flourish
Fresh Herbs (optional but recommended): A handful of chopped fresh rosemary or oregano kneaded into the dough transforms this from good to legendary. The herbs release their oils during cooking, creating these incredible aromatic pockets. Dried herbs work in a pinch, but fresh will make you question why you ever used the dried stuff.
Everything's prepped? Good. Let's get into the real action...

The Method — Step by Step
- Start by whisking together your flour and salt in a large bowl. Make a well in the center – think of it like a flour volcano with a crater perfect for your liquids. This ancient technique ensures the salt doesn't come into direct contact with the yeast initially, which can slow down fermentation. Pour in your warm water and olive oil, then sprinkle the yeast over the top. Let it sit for exactly two minutes. You'll see the yeast start to activate – those tiny bubbles forming are like watching the bread come alive before your eyes.
- Now comes the fun part. Using a wooden spoon (or your hands if you're feeling brave), mix everything together until it forms a shaggy dough. Don't stress if it looks like a mess at this stage – that's exactly what it should look like. Turn it out onto a lightly floured surface and prepare for the workout. Knead for 8-10 minutes, adding flour sparingly if needed. The dough should go from rough and sticky to smooth and elastic. You'll know it's ready when you can press your finger into it and it springs back slowly, leaving just a slight indentation.
- Shape your dough into a beautiful ball – tuck the edges underneath and rotate it in your hands until you have something that looks like it belongs on a bakery shelf. Place it in an oiled bowl, turning once to coat the top with oil. This prevents a crust from forming. Cover with plastic wrap or a damp kitchen towel. Now, here's where patience becomes your secret ingredient. Let it rise in a warm spot for 1-2 hours until doubled in size. I like to put it in my oven with just the light on – creates the perfect environment.
- Once your dough has doubled, punch it down – and yes, this is as satisfying as it sounds. Divide it into 4 equal pieces for individual flatbreads, or keep it whole for one large family-style version. Roll each piece into a ball and let them rest for 15 minutes. This relaxation period is crucial – it makes the dough easier to shape and prevents it from springing back when you roll it out.
- Heat a cast-iron skillet or heavy-bottomed pan over medium-high heat. You want it hot enough that a drop of water sizzles and evaporates almost immediately. Roll out your first piece of dough on a lightly floured surface, aiming for about 1/4 inch thick. Don't worry about perfect circles – rustic shapes are part of the charm. Brush the top lightly with olive oil and sprinkle with a pinch of flaky sea salt.
- Carefully transfer your rolled dough to the hot skillet. That sizzle when it hits the pan? Absolute perfection. Cook for 2-3 minutes on the first side – you'll see bubbles forming and the edges start to pull away from the pan. Flip and cook another 1-2 minutes on the second side. The bread should have beautiful charred spots and feel light and hollow when you pick it up.
- Remove from the pan and immediately brush with a little more olive oil. This creates that gorgeous sheen and adds another layer of flavor. If you're adding herbs, now's the time – the residual heat will release their aromatic oils. Stack cooked flatbreads on a plate and cover with a clean kitchen towel to keep them warm and soft while you cook the remaining pieces.
- For the final flourish, serve warm with a drizzle of your best olive oil, a sprinkle of za'atar, or just enjoy them plain – they're honestly perfect on their own. The contrast between the crispy edges and soft center, the way the olive oil mingles with the slightly tangy flavor from fermentation – this is what Mediterranean cooking is all about.
That's it – you did it. But hold on, I've got a few more tricks that'll take this to another level...
Insider Tricks for Flawless Results
The Temperature Rule Nobody Follows
Most people cook flatbread over medium heat and wonder why it turns out dense and chewy. Here's the truth: you need that initial blast of high heat to create the steam that forms those gorgeous air bubbles. Start with your pan screaming hot, then adjust down if needed. The high temperature creates the contrast between crispy exterior and soft interior that makes professional flatbreads so addictive. I've seen home cooks baby their dough with low heat, resulting in something that resembles cardboard more than bread.
Why Your Nose Knows Best
Don't rely on timers alone – your senses are your best kitchen tool. When the flatbread is almost done, you'll smell that incredible nutty aroma that signals the Maillard reaction is working its magic. The edges should be just starting to color, and the bread should feel light when you flip it. One friend timed everything perfectly but missed these sensory cues, ending up with flatbread that looked right but tasted flat. Trust your instincts – if it smells amazing, it's probably done.
The 5-Minute Rest That Changes Everything
After cooking, resist the urge to immediately dive in. Let your flatbreads rest for just 5 minutes – this allows the steam to redistribute, preventing them from becoming soggy when you stack them. I know, I know, when they smell that good, waiting feels impossible. But this short rest ensures they stay perfect whether you serve them immediately or an hour later. Plus, it gives you time to set up your toppings or dips.
The Secret Second Rise
Here's where most recipes miss the boat – after you've shaped your dough balls, let them rise again for 30 minutes before rolling. This second fermentation develops more complex flavors and creates a lighter texture. I've tested side-by-side batches, and the double-risen version always wins taste tests by a landslide. The extra time allows the yeast to create more air pockets, resulting in that authentic Mediterranean texture.
Cast Iron vs. Everything Else
Can you make this in a regular pan? Sure. Will it be as good? Not even close. Cast iron retains heat like nothing else, creating that perfect sear that gives you those gorgeous charred spots. If you don't have cast iron, use your heaviest pan and let it heat up longer than you think necessary. A friend tried this with a thin non-stick pan and wondered why her flatbreads looked anemic. Heavy pans are worth their weight in gold here.
Creative Twists and Variations
This recipe is a playground. Here are some of my favorite ways to switch things up:
The Everything Bagel Flatbread
Brush the top with olive oil and sprinkle generously with everything bagel seasoning before cooking. The sesame seeds toast beautifully, the garlic gets crispy, and you end up with something that tastes like the best bagel you've ever had, but in flatbread form. My New York friends say it's better than their favorite bagel shop.
Fire-Roasted Tomato and Basil
Knead chopped sun-dried tomatoes and fresh basil into the dough. The tomatoes add these little pockets of intense flavor, while the basil perfumes the entire bread. Serve with burrata and a drizzle of balsamic reduction for an appetizer that'll make people think you trained in Italy.
Spicy Harissa Swirl
Mix a tablespoon of harissa paste into your olive oil before brushing it on. The North African spice blend creates this gorgeous red swirl pattern and adds a gentle heat that builds as you eat. Perfect with grilled vegetables or as a base for Mediterranean tacos.
Cheese-Stuffed Wonder
Roll out your dough, sprinkle crumbled feta or goat cheese over half, fold it over and seal the edges, then roll again. The cheese melts into every bite, creating these incredible savory surprises. Fair warning: once you try this version, plain flatbread might seem boring.
Herb Garden Explosion
Add a tablespoon each of chopped fresh rosemary, thyme, and oregano to the dough. The combination creates this incredible Mediterranean herb garden aroma that'll have neighbors knocking on your door. It's like summer in bread form, even in the middle of winter.
Sweet Cinnamon Sugar Version
Omit the salt from the dough, brush with butter instead of olive oil, and sprinkle with cinnamon sugar. Cook as usual, then drizzle with honey while still warm. It transforms into dessert flatbread that's crispy, sweet, and completely addictive. My kids prefer this version to cookies.
Storing and Bringing It Back to Life
Fridge Storage
Cooked flatbreads keep beautifully in the fridge for up to 5 days. Layer them between sheets of parchment paper in an airtight container to prevent sticking. I've found that storing them slightly warm (not hot) helps maintain their flexibility. The key is letting them cool completely before refrigerating – trapping steam creates condensation that leads to soggy bread. If you've added fresh herbs or cheese, use within 3 days for optimal flavor.
Freezer Friendly
These freeze like champions for up to 3 months. I like to flash-freeze them individually on a baking sheet for 2 hours, then stack them with parchment between each piece and store in a freezer bag. This prevents them from becoming one giant flatbread brick that you'll need dynamite to separate. When you're ready to eat, you can go directly from freezer to toaster – no thawing required. They actually crisp up beautifully this way.
Best Reheating Method
Skip the microwave – it'll turn your beautiful flatbread into a rubbery disappointment. Instead, warm a dry skillet over medium heat and reheat each side for 30-60 seconds. Add a tiny splash of water before reheating – it steams back to perfection, restoring that fresh-from-the-oven texture. For multiple pieces, wrap them in foil and warm in a 350°F oven for 8-10 minutes. If you're feeling fancy, brush with a little olive oil before reheating to bring back that just-cooked shine.