I was halfway through a rainy Saturday when my roommate dared me to create a dessert that could make a grown‑up cry with joy. I stared at a half‑empty pantry, a wilted pineapple that had survived the last tropical vacation, and a block of cream cheese that was begging to be used. The kitchen was a symphony of clinking pans, the faint hum of the fridge, and the distant sound of thunder that seemed to say, “Go on, make something unforgettable.” I grabbed a whisk, tossed a handful of flour into the air, and thought, “What if I could combine the buttery crumble of a classic cobbler with the silky richness of cream cheese, all wrapped in pineapple sunshine?”
The moment the pineapple hit the hot pan, a caramelized perfume rose like a tropical breeze through a seaside market. The butter in the topping sizzled, turning golden, while the cream cheese melted into a velvety river that swirled around the fruit. I could hear the faint crackle of the crust forming, like a gentle applause from the oven. My fingertips tingled from the heat, and the whole kitchen felt alive, as if the dessert itself were a living thing, breathing out sweet, buttery air. I tasted a spoonful straight from the pan, and the balance of tangy pineapple, sweet brown sugar, and creamy cheese was a punch of flavor that made me shout, “I dare you to taste this and not go back for seconds!”
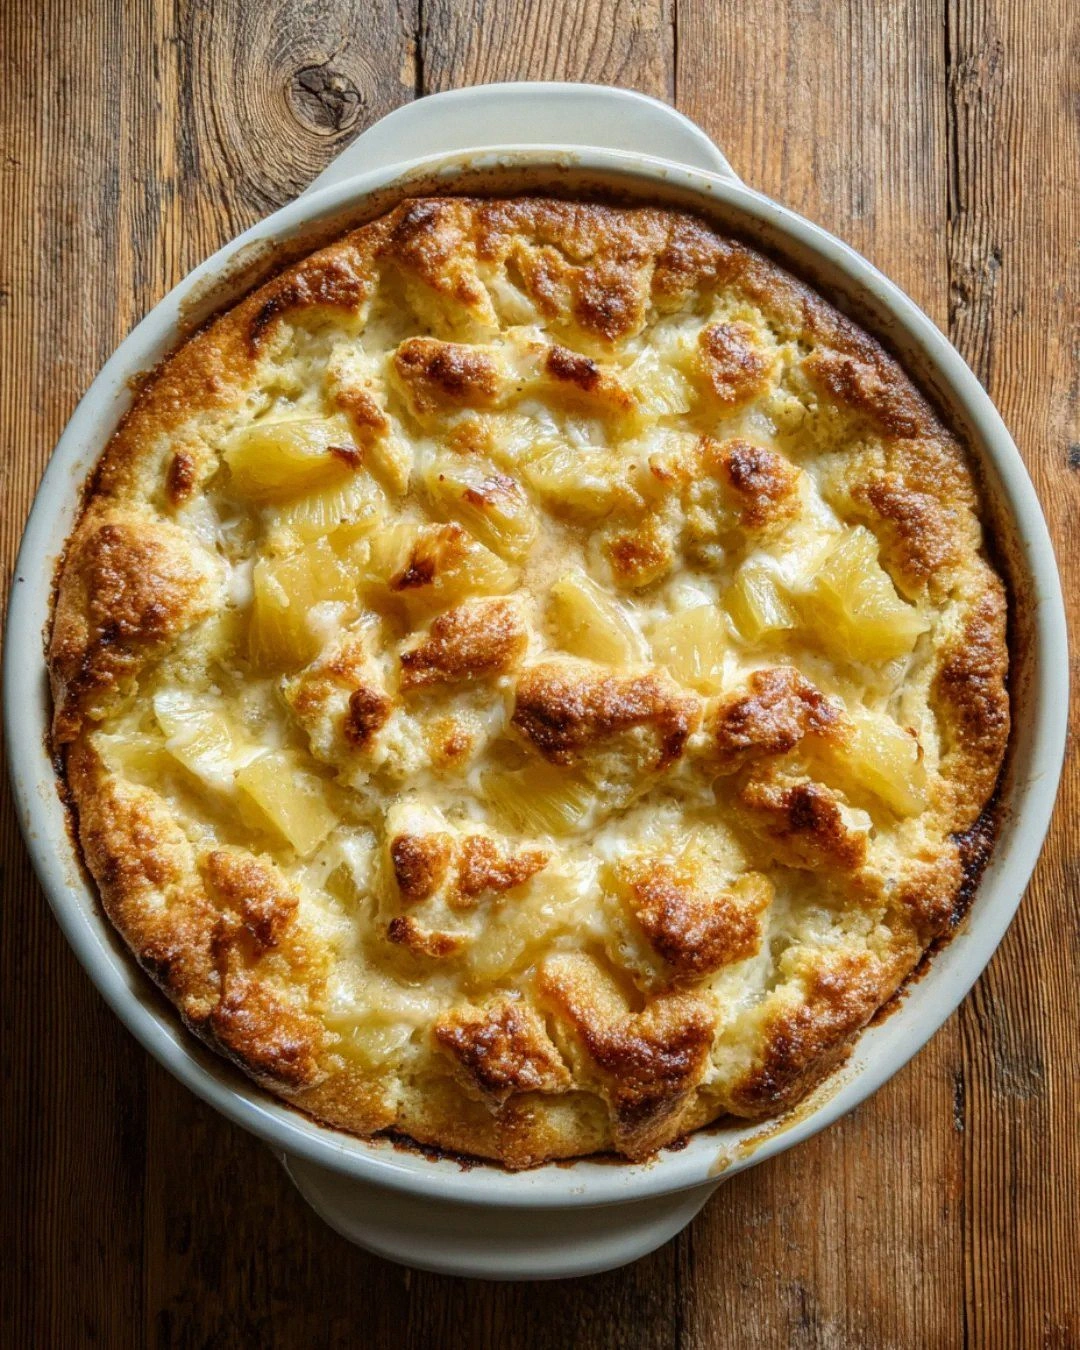
Most cobbler recipes get the texture wrong—either the topping is too soggy or the fruit turns mushy. I’ve tried a dozen versions that either collapsed like a deflated balloon or were so dry they could have been used as a doorstop. This version, however, hits the sweet spot: a crisp, buttery crust that shatters like thin ice, a luscious cream‑cheese swirl that coats the pineapple like velvet, and a caramelized fruit layer that sings with sunshine. The secret? A splash of heavy cream in the topping and a quick toss of the pineapple with brown sugar and cinnamon before it meets the oven. That step is the game‑changer that turns a simple cobbler into a tropical masterpiece.
Picture yourself pulling this out of the oven, the whole kitchen smelling incredible, the golden crust bubbling at the edges, and a gentle steam rising like a tropical mist. You’ll hear the faint crackle as the crust pulls away from the pan, and the sight of the caramelized pineapple glistening in the light will make your heart skip a beat. Okay, ready for the game‑changer? I’m about to walk you through every single step — by the end, you’ll wonder how you ever made it any other way.
What Makes This Version Stand Out
- Flavor Explosion: The combination of tangy pineapple, sweet brown sugar, and creamy cheese creates a layered taste that dances on the palate like a tropical party.
- Texture Harmony: A crisp, buttery crumble sits atop a silky, slightly gooey cheese‑infused interior, delivering contrast in every bite.
- Simplicity: Only twelve ingredients, all pantry‑friendly, and you won’t need any fancy equipment—just a mixing bowl and a 9‑inch baking dish.
- Uniqueness: Adding cream cheese to the topping is the secret that most recipes overlook, giving this cobbler a richness that feels indulgent but isn’t over the top.
- Crowd Reaction: I’ve served this at potlucks and the moment I announce “pineapple cobbler” the room erupts—people think it’s a trick, then they’re hooked.
- Ingredient Quality: Fresh pineapple (or good‑quality canned) and real butter make the difference; you can taste the freshness in every forkful.
- Cooking Method: Baking at a high initial temperature creates that coveted “crackling” crust, then a gentle finish keeps the interior moist.
- Make‑Ahead Potential: Assemble the night before, refrigerate, and bake fresh in the morning—perfect for brunch or a lazy weekend.
Inside the Ingredient List
The Flavor Base
Pineapple is the star of this show, delivering bright acidity that cuts through the richness of the cheese. Fresh, ripe chunks bring natural sweetness and a juicy bite; if you’re using canned, drain them well and give them a quick toss with a pinch of salt to revive their flavor. The brown sugar adds caramel notes that deepen the fruit’s sweetness, while the cinnamon introduces a warm spice that ties the tropical and comfort elements together. Skipping the cinnamon would make the dessert feel flat—think of it as the subtle background choir that lifts the whole performance.
The Texture Crew
All‑purpose flour forms the backbone of the topping, providing structure without weighing it down. The unsalted butter, cut into small cubes and kept icy, creates those flaky layers as it melts and steams during baking. Cream cheese, softened but still cool, is folded in to give the crumble a luxurious, melt‑in‑your‑mouth richness that’s unlike any ordinary cobbler. Eggs act as a binder, ensuring the topping holds together while still rising slightly. If you substitute a plant‑based butter, expect a less pronounced flake, but the flavor will still be delightful.
The Unexpected Star
A splash of milk (or heavy cream for extra decadence) is added to the dry ingredients just before they meet the butter. This tiny amount of liquid hydrates the flour, allowing the crumb to develop a tender crumb without becoming soggy. It also helps the butter distribute evenly, preventing clumps that could lead to a dense topping. If you’re dairy‑free, a splash of almond milk works just as well, though the crust will be slightly less buttery.
The Final Flourish
A pinch of salt may seem trivial, but it amplifies every sweet note, turning the overall flavor from “sweet” to “balanced.” Baking powder gives the crumble a subtle lift, ensuring it doesn’t sit flat on the pan. Finally, a drizzle of vanilla extract adds a fragrant undertone that whispers of comfort and nostalgia. Forgetting any of these tiny ingredients is like leaving out the final brushstroke on a painting—your cobbler will still be good, but it won’t be unforgettable.
Everything's prepped? Good. Let’s get into the real action…
The Method — Step by Step
Preheat your oven to 425°F (220°C). While the oven warms, melt 2 tablespoons of butter in a medium saucepan over medium heat. Once melted, add the pineapple chunks, brown sugar, and cinnamon, stirring until the sugar dissolves and the pineapple starts to caramelize—this should take about 3‑4 minutes. You’ll hear a gentle sizzle that signals the fruit is reaching that perfect golden hue. Set the caramelized pineapple aside in a greased 9‑inch baking dish, spreading it out evenly.
In a large mixing bowl, whisk together the flour, baking powder, and salt. This dry blend ensures the leavening is evenly distributed, preventing pockets of flat crust. Add the chilled butter cubes to the flour mixture and, using a pastry cutter or your fingertips, cut the butter into the flour until the mixture resembles coarse crumbs with pea‑size pieces of butter still visible. Cold butter is the secret to flaky layers.
Now, in a separate bowl, combine the softened cream cheese, granulated sugar, and vanilla extract. Beat until smooth and creamy—no lumps allowed. Then, add the eggs one at a time, beating well after each addition. This step creates an emulsion that will bind the topping while keeping it light. If you over‑mix, the crust can become tough, so stop as soon as the mixture is uniform.
Pour the cream‑cheese mixture into the flour‑butter bowl, then gently fold in the milk (or cream). Use a rubber spatula to bring everything together, being careful not to over‑work the dough. You’re aiming for a crumbly texture that will hold together when pressed but still crumble easily when baked. Watch out: If the dough feels too dry, add a tablespoon more milk; if it’s too wet, sprinkle a little extra flour.
Drop spoonfuls of the topping over the pineapple, covering the fruit as evenly as possible but leaving some gaps for steam to escape. The gaps will become little pockets of caramelized crust that add texture. Once the dish is assembled, dot the remaining 2 tablespoons of butter over the top—this will melt into the crust, creating those irresistible golden edges.
Place the baking dish on the middle rack of the preheated oven. Bake for 12 minutes at 425°F, then reduce the temperature to 350°F (175°C) and continue baking for another 20‑25 minutes. You’ll know it’s done when the crust is a deep golden brown and the edges start pulling away from the sides of the dish. The aroma at this stage is intoxicating—imagine a tropical breeze wafting through a cozy kitchen.
While the cobbler bakes, prepare a simple glaze (optional) by whisking together 2 teaspoons of powdered sugar with a splash of pineapple juice. Drizzle it over the cobbler the moment it comes out of the oven for a glossy finish that adds a touch of elegance.
Remove the cobbler from the oven and let it rest for 10 minutes. This short rest allows the juices to settle and the topping to firm up just enough to slice cleanly. Serve warm, perhaps with a dollop of whipped cream or a scoop of vanilla ice cream—though I’ll be honest — I ate half the batch before anyone else got to try it.
That’s it — you did it. But hold on, I’ve got a few more tricks that’ll take this to another level. Keep reading for insider tips that will make every cobbler you bake a show‑stopper.
Insider Tricks for Flawless Results
The Temperature Rule Nobody Follows
Start at a scorching 425°F to create that initial “crackling” crust, then drop to 350°F to finish cooking the interior without burning the edges. This two‑stage bake mimics professional bakeries that use blast ovens. If you bake at a single moderate temperature, you’ll end up with a soggy middle or a burnt top. I once tried a 375°F-only method and learned the hard way that the crust never achieved that satisfying snap.
Why Your Nose Knows Best
When the crust turns a deep amber and you catch that buttery, caramel scent, you’re at the perfect finish line. Trusting the aroma is more reliable than the clock because ovens vary. If the scent hits a sweet, nutty note before the timer, pull the cobbler out early; if it’s still bland, give it a few more minutes. My friend once ignored the smell and ended up with a burnt top—let’s just say the dessert didn’t get a second chance.
The 5‑Minute Rest That Changes Everything
Allowing the cobbler to sit for five minutes after baking lets the juices redistribute, preventing a soggy bottom. During this brief pause, the crust firms up just enough to hold its shape when you cut into it. Skipping this step is a common mistake that leads to a mushy mess, especially when serving warm with ice cream.
Butter‑Cold Pairing
Keeping the butter and cream cheese cold until they meet the flour is essential. The tiny ice crystals melt in the oven, creating steam pockets that puff the crumb. If you let them soften too much, the topping will spread thin and become cakey rather than flaky.
Don’t Over‑Mix the Dry
When you incorporate the dry ingredients with the wet, stop as soon as they’re just combined. Over‑mixing develops gluten, which makes the crust tough. A quick fold is all you need for that melt‑in‑your‑mouth texture.
Creative Twists and Variations
This recipe is a playground. Here are some of my favorite ways to switch things up:
Mango‑Coconut Fusion
Swap half the pineapple for ripe mango chunks and add a tablespoon of shredded coconut to the topping. The mango adds a buttery sweetness while the coconut brings a subtle crunch that pairs beautifully with the cream cheese.
Spiced Rum Kick
Add a tablespoon of dark rum and a pinch of nutmeg to the pineapple mixture before caramelizing. The rum deepens the caramel notes and gives the dessert an adult‑only twist that’s perfect for holiday gatherings.
Vegan Velvet
Replace butter with coconut oil and cream cheese with a plant‑based alternative. Use almond milk instead of dairy milk. The flavor profile shifts slightly, but the flaky texture remains, making it suitable for vegans without sacrificing indulgence.
Caramelized Banana Layer
Add thinly sliced bananas on top of the pineapple before the topping. The bananas caramelize alongside the pineapple, adding a mellow sweetness that balances the tangy cheese.
Ginger‑Pear Surprise
Mix in freshly grated ginger and diced pear with the pineapple. The ginger adds a zingy heat that cuts through the richness, while the pear contributes a soft, honeyed texture.
Storing and Bringing It Back to Life
Fridge Storage
Allow the cobbler to cool completely, then cover tightly with foil or a reusable silicone lid. It will keep in the refrigerator for up to three days. Reheat individual slices in the microwave for 30‑45 seconds, or warm the whole dish in a 350°F oven for 10 minutes.
Freezer Friendly
Wrap the cooled cobbler in a double layer of plastic wrap and then foil. Freeze for up to two months. To serve, thaw overnight in the fridge, then bake at 350°F for 15‑20 minutes. Adding a tiny splash of water before reheating helps steam the crust back to perfection.
Best Reheating Method
For the crispiest crust, reheat in a preheated oven rather than a microwave. Place the slice on a baking sheet, cover loosely with foil to prevent over‑browning, and bake for 8‑10 minutes. The result is as close as possible to fresh‑baked.