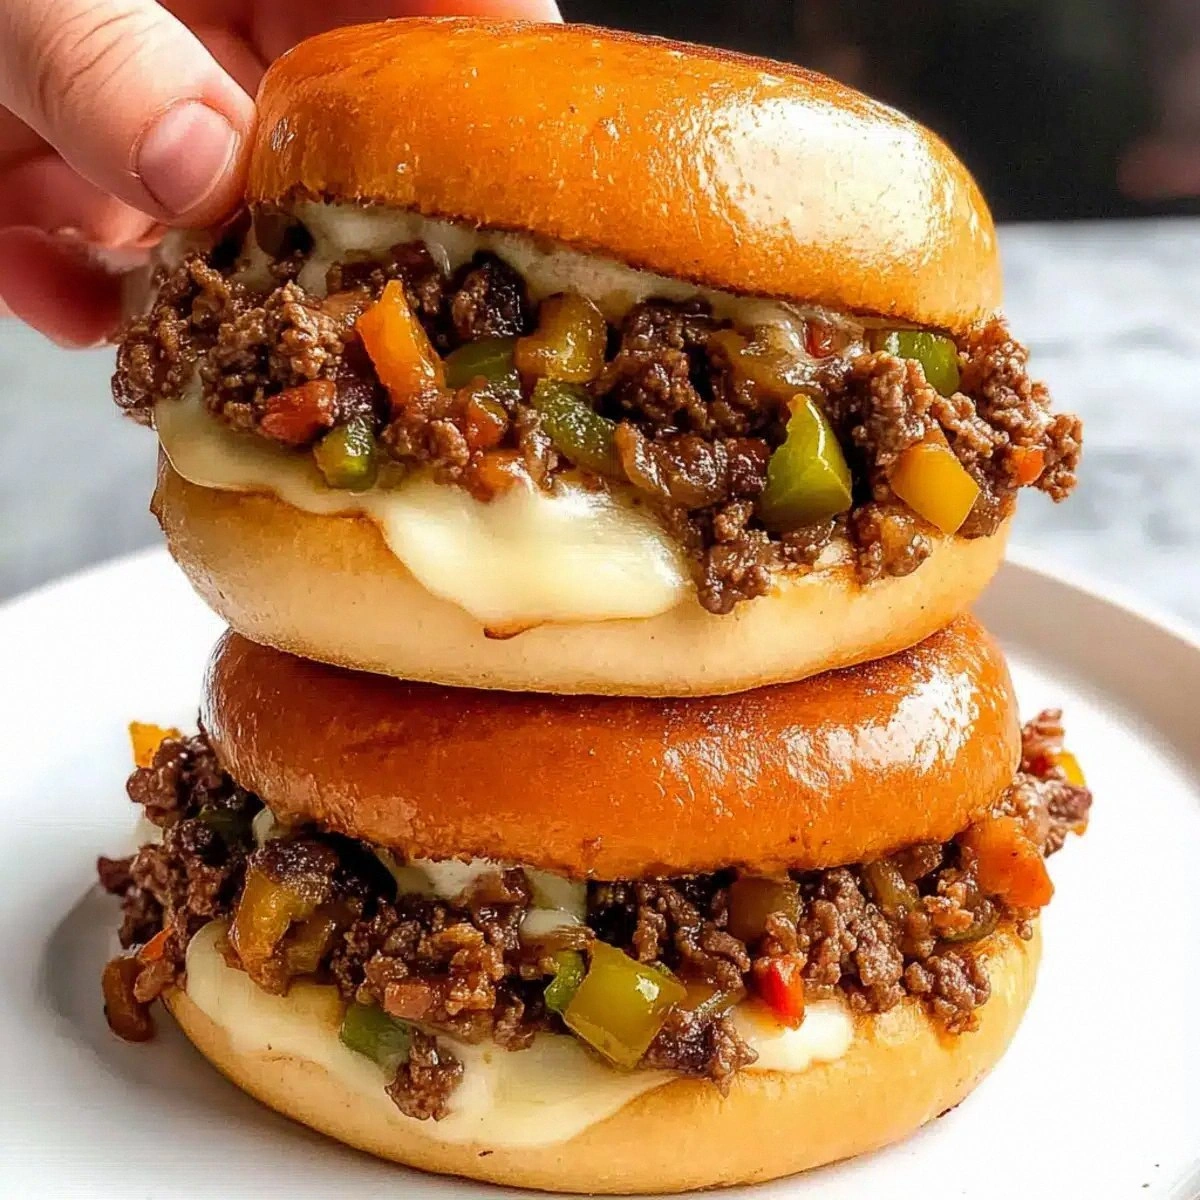
I was halfway through a marathon Netflix binge when my roommate shouted, “Who’s up for wings?” I answered with a half‑hearted “Sure,” only to discover the last batch in the freezer was a sad, limp mess that tasted like cardboard. That moment sparked a kitchen‑wide epiphany: I needed a wing recipe that could turn a frozen disappointment into a fireworks display of flavor, texture, and brag‑worthy aroma. I dug through my spice rack, consulted old cookbooks, and even called my aunt who runs a barbecue joint in Texas. The result? A dry rub so bold it makes pepper shy, a cooking method that guarantees crunch without the grease‑splatter nightmare, and a flavor profile that screams “party” from the first bite.
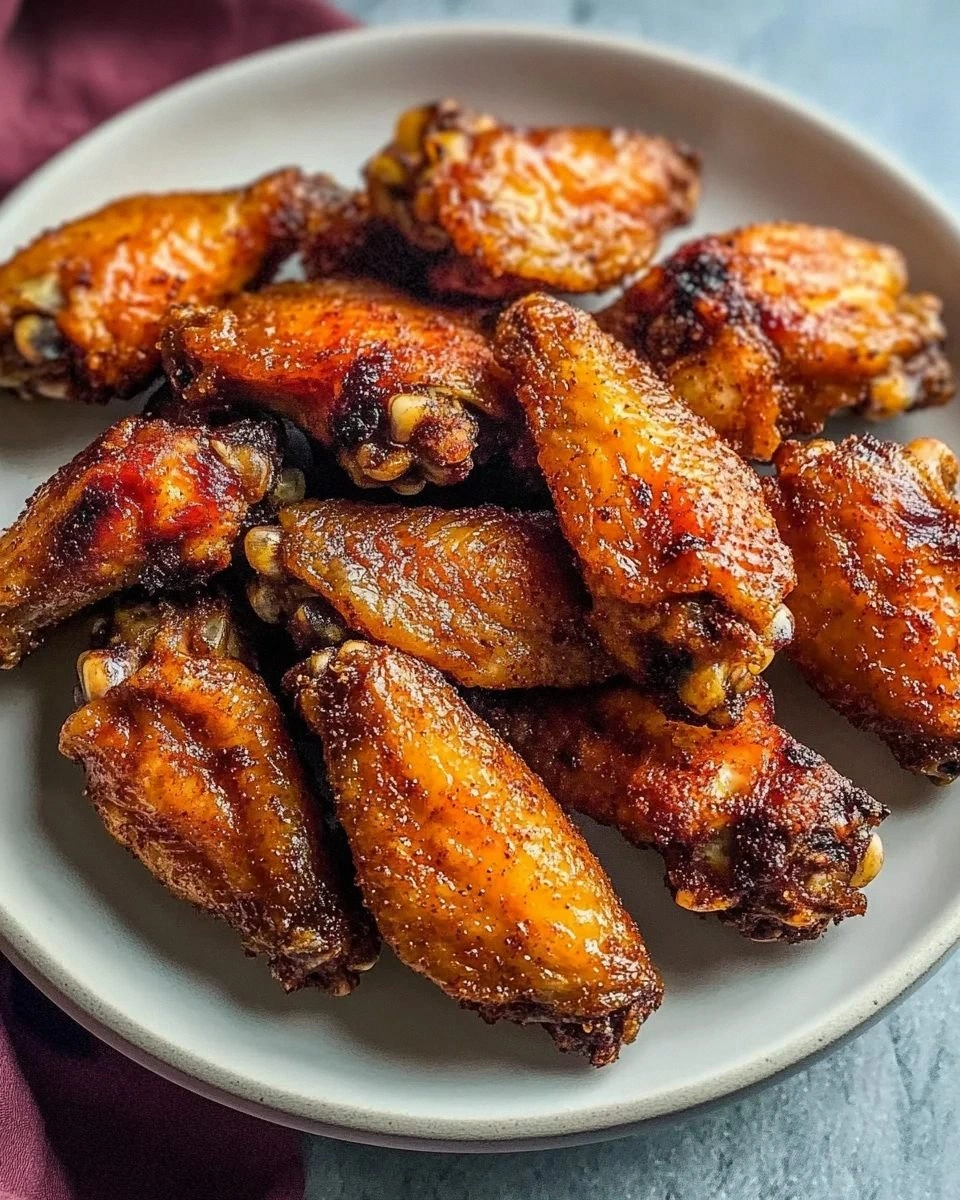
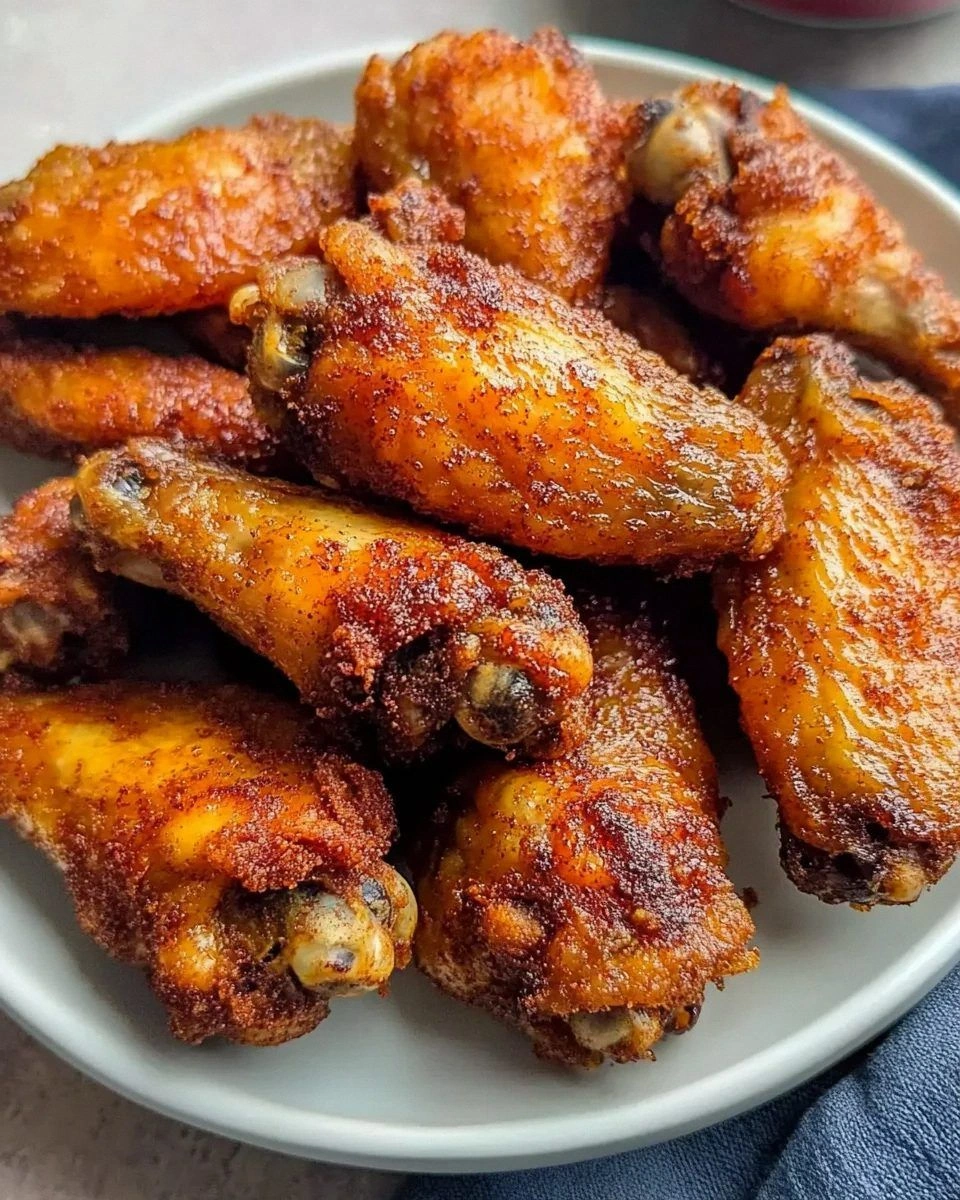
Picture this: the oven hums like a low‑pitched drum, the air fills with a smoky, caramelized perfume that makes your stomach do a little jig, and the wings themselves start to blush a deep mahogany as the rub caramelizes. You hear the faint crackle of the skin as it contracts, a sound that’s half sizzle, half applause. The moment you pull the tray out, the heat radiates a comforting warmth that makes the whole kitchen feel like a cozy tavern on a cold night. The first bite delivers a crunch that shatters like thin ice, followed by a burst of savory, sweet, and slightly spicy notes that dance across your palate. It’s an experience that makes you want to shout, “I dare you to taste this and not go back for seconds!”
Most wing recipes get the balance wrong—either they drown the meat in sauce, or they leave it dry as a desert. This version, however, embraces the dry‑rub philosophy, letting the chicken’s natural juices mingle with a meticulously calibrated blend of spices that cling to every crevice. I’ll be honest — I ate half the batch before anyone else got to try it, and that’s a testament to how addictive this rub truly is. The secret lies in a simple technique: a brief resting period that lets the rub penetrate the meat, followed by a high‑heat bake that creates that coveted crackle without frying. If you’ve ever struggled with soggy wings, you’re not alone — and I’ve got the fix.
Let me walk you through every single step — by the end, you’ll wonder how you ever made it any other way. Okay, ready for the game‑changer? This next part? Pure magic. We’ll start with the science behind each spice, move on to the perfect prep routine, and finish with a few insider tricks that will elevate your wings from “good” to “legendary.” Stay with me here — this is worth it.
What Makes This Version Stand Out
- Flavor Explosion: The rub combines smoky paprika, sweet brown sugar, and a hint of cayenne, creating a layered taste that builds with every bite.
- Ultimate Crunch: Baking at a scorching 425°F renders the skin ultra‑crisp while keeping the meat juicy, achieving that perfect “shatter‑like‑ice” texture.
- Simplicity: Only a handful of pantry staples are required, meaning you won’t need a trip to the specialty store to pull this off.
- Unique Spice Blend: I added a pinch of ground coffee for depth, a trick most recipes overlook, giving the wings an almost caramel‑like undertone.
- Crowd‑Pleaser: Whether it’s a game night, a family dinner, or a solo binge, these wings get a unanimous “more, please” from every guest.
- Ingredient Quality: Using fresh, unseasoned chicken wings lets the rub shine, and the modest amount of oil prevents sogginess.
- Cooking Method: The oven’s dry heat mimics a convection fryer, delivering that restaurant‑style crunch without the mess.
- Make‑Ahead Potential: The rub can be prepared days in advance, and the wings reheat beautifully, making them perfect for meal prep.
Alright, let's break down exactly what goes into this masterpiece…
Inside the Ingredient List
The Flavor Base
At the heart of this rub sits smoked paprika, delivering a deep, earthy smokiness that mimics a low‑and‑slow barbecue without the actual smoke. Brown sugar adds a caramelized sweetness that balances the heat from cayenne and black pepper, creating a harmonious sweet‑heat duet. Garlic powder and onion powder provide a savory backbone, ensuring each bite feels full‑bodied rather than one‑dimensional. If you’re missing smoked paprika, a quick dash of liquid smoke mixed with regular paprika does the trick, though the texture will be slightly different.
The Texture Crew
A modest drizzle of olive oil coats the wings just enough to help the rub adhere without drowning the skin, which is crucial for that coveted crunch. The oil also acts as a heat conductor, promoting even browning across the surface. For those who prefer a richer mouthfeel, you can swap olive oil for melted butter, but keep in mind the butter’s lower smoke point may require a slightly lower oven temperature.
The Unexpected Star
Ground coffee might sound like a culinary crime, but a teaspoon of it adds a subtle bitterness that cuts through the sweetness and amplifies the umami. This secret ingredient is why the rub feels “complex” rather than “one‑note.” If coffee isn’t your jam, try a pinch of cocoa powder for a similar depth without the caffeine kick.
The Final Flourish
A final pinch of sea salt not only seasons the meat but also helps draw moisture to the surface, allowing the rub to form that beautiful crust. Salt is the unsung hero that makes flavors pop, and using a flaky sea salt adds a subtle crunch on the very outermost layer. If you’re watching sodium, reduce the amount, but don’t skip it entirely—your taste buds will thank you.
Everything's prepped? Good. Let's get into the real action…
The Method — Step by Step
Preheat your oven to a blistering 425°F (220°C). While the oven warms, line a large baking sheet with aluminum foil and place a wire rack on top; this setup ensures air circulates around each wing, preventing sogginess. I dare you to taste this and not go back for seconds after you hear that initial sizzle when the wings hit the hot rack.
Pat the 2 pounds of chicken wings dry with paper towels. Removing excess moisture is critical because any water left on the surface will steam the skin instead of crisping it. This is the moment of truth: the wings should feel almost parchment‑like to the touch.
In a medium bowl, combine smoked paprika, brown sugar, cayenne, garlic powder, onion powder, ground coffee, black pepper, and sea salt. Toss the spices together for about 30 seconds to let their aromas mingle—think of it as a mini‑dance party for your senses.
Drizzle the olive oil over the wings, then toss them until each piece is lightly coated. This thin oil layer is what helps the rub cling and the skin crisp. Watch Out: Adding too much oil will result in soggy wings; a light coating is all you need.
Generously sprinkle the spice blend over the wings, using your hands to massage it into every crevice. The rub should form a thin, even coating that clings like a second skin. If you notice any dry patches, add a splash more oil and keep massaging.
Arrange the wings in a single layer on the wire rack, making sure they don’t touch. Overcrowding will trap steam and sabotage the crunch you’re after. The wings should have a little breathing room, like guests at a cocktail party.
Slide the tray into the preheated oven and bake for 20 minutes. Halfway through, flip each wing using tongs so both sides get equal exposure to the heat. You’ll know they’re on the right track when the edges start pulling away from the meat, and the aroma becomes irresistibly toasty.
Increase the oven temperature to 450°F (230°C) for the final 10 minutes. This boost is the secret to that ultra‑crisp skin that shatters like thin ice. Keep a vigilant eye—if the rub begins to darken too quickly, tent the wings loosely with foil to prevent burning.
Remove the wings from the oven and let them rest for 5 minutes on the rack. This short rest allows the juices to redistribute, keeping the meat moist while the exterior stays crisp. Serve immediately with your favorite dipping sauce, or just dive in—no sauce needed.
That's it — you did it. But hold on, I've got a few more tricks that'll take this to another level. The next sections will show you how to fine‑tune texture, boost flavor, and keep your wings glorious even days later.
Insider Tricks for Flawless Results
The Temperature Rule Nobody Follows
Most home cooks set the oven to a single temperature and forget about the power of a two‑stage bake. Starting at 425°F creates a gentle cook that renders fat, while the final 450°F blast locks in that crunch. If you skip the high‑heat finish, you’ll end up with wings that are cooked through but lack that signature crackle. Trust me, this tweak turns good wings into unforgettable ones.
Why Your Nose Knows Best
Your sense of smell is a more reliable indicator than a timer when it comes to dry rub wings. When the kitchen fills with a sweet‑smoky scent and you hear the faint pop of skin pulling, you’re at the perfect point to flip. If you rely solely on the clock, you risk either under‑cooking or burning the rub. So keep your nose open and let it guide you.
The 5‑Minute Rest That Changes Everything
Resting isn’t just for steaks; wings benefit enormously from a brief pause after baking. Those five minutes let the internal juices settle, preventing a flood of liquid when you bite in. A friend once tried to serve the wings straight from the oven, and the result was a soggy mess that ruined the crisp. Learn from that tragedy and always give your wings a short breather.
Seasoning the Rack
A little sprinkle of salt on the wire rack itself can help draw out excess moisture from the underside of the wings, contributing to an even more uniform crisp. This is a pro tip you won’t find in most recipes, and it’s especially useful if you’re cooking a large batch. Just a pinch will do; you don’t want the rack to become a salty battlefield.
The Double‑Coat Technique
For the ultimate crunch, apply half of the rub, bake for 15 minutes, then add the remaining rub and finish the bake. This method builds a layered crust that’s both flavorful and texturally complex. I tried it once and the wings were so addictive that my guests asked for the recipe before I even finished serving the first plate.
Creative Twists and Variations
This recipe is a playground. Here are some of my favorite ways to switch things up:
Maple‑Bacon Bliss
Swap half the brown sugar for pure maple syrup and crumble cooked bacon into the rub. The result is a sweet‑savory combo that pairs perfectly with a drizzle of extra maple on the finished wings.
Asian Zing
Replace smoked paprika with Chinese five‑spice, add a teaspoon of sesame oil, and finish with a sprinkle of toasted sesame seeds. Serve with a side of soy‑ginger dipping sauce for an umami punch.
Citrus Heat
Add the zest of one lime and a pinch of ground chipotle to the rub. The citrus brightens the flavor while the chipotle adds a smoky heat that lingers pleasantly.
Herbaceous Garden
Mix dried rosemary, thyme, and oregano into the spice blend, and finish the wings with a drizzle of herb‑infused olive oil after baking. This version is perfect for a spring brunch.
Cheesy Jalapeño
Stir finely grated Parmesan and chopped fresh jalapeños into the rub. The cheese creates a subtle crust, while the jalapeños bring a fresh, bright heat.
Storing and Bringing It Back to Life
Fridge Storage
Place cooled wings in an airtight container and store them in the refrigerator for up to 3 days. A paper towel at the bottom absorbs excess moisture, preserving crispness. When you’re ready to eat, reheat in a preheated 400°F oven for 8‑10 minutes.
Freezer Friendly
Lay the baked wings on a parchment‑lined tray and freeze them uncovered for 2 hours, then transfer to a zip‑top bag. They’ll keep for up to 2 months. To revive, bake straight from frozen at 425°F for 20‑25 minutes, adding a splash of water to the pan to generate steam and prevent drying.
Best Reheating Method
The oven is your best friend for reheating; it restores the crunch without making the meat rubbery. Set the oven to 375°F, place wings on a wire rack, and sprinkle a teaspoon of water over the tray—this creates a gentle steam that refreshes the interior while the exterior crisps up again.