I was in the middle of a rainy Saturday morning, half‑asleep, when my roommate dared me to make “something that would make the whole apartment smell like a maple‑scented hug.” I laughed, grabbed the nearest bag of flour, and set out on a culinary adventure that quickly turned into a full‑blown love affair with sticky buns. The first batch I attempted was a disaster: the dough was dense, the glaze was thin, and the pecans were just a sad garnish. I swear I could hear the kitchen sigh in disappointment, and that’s when I decided to go back to the drawing board, armed with a notebook, a pinch of stubbornness, and a secret weapon – pure maple syrup.
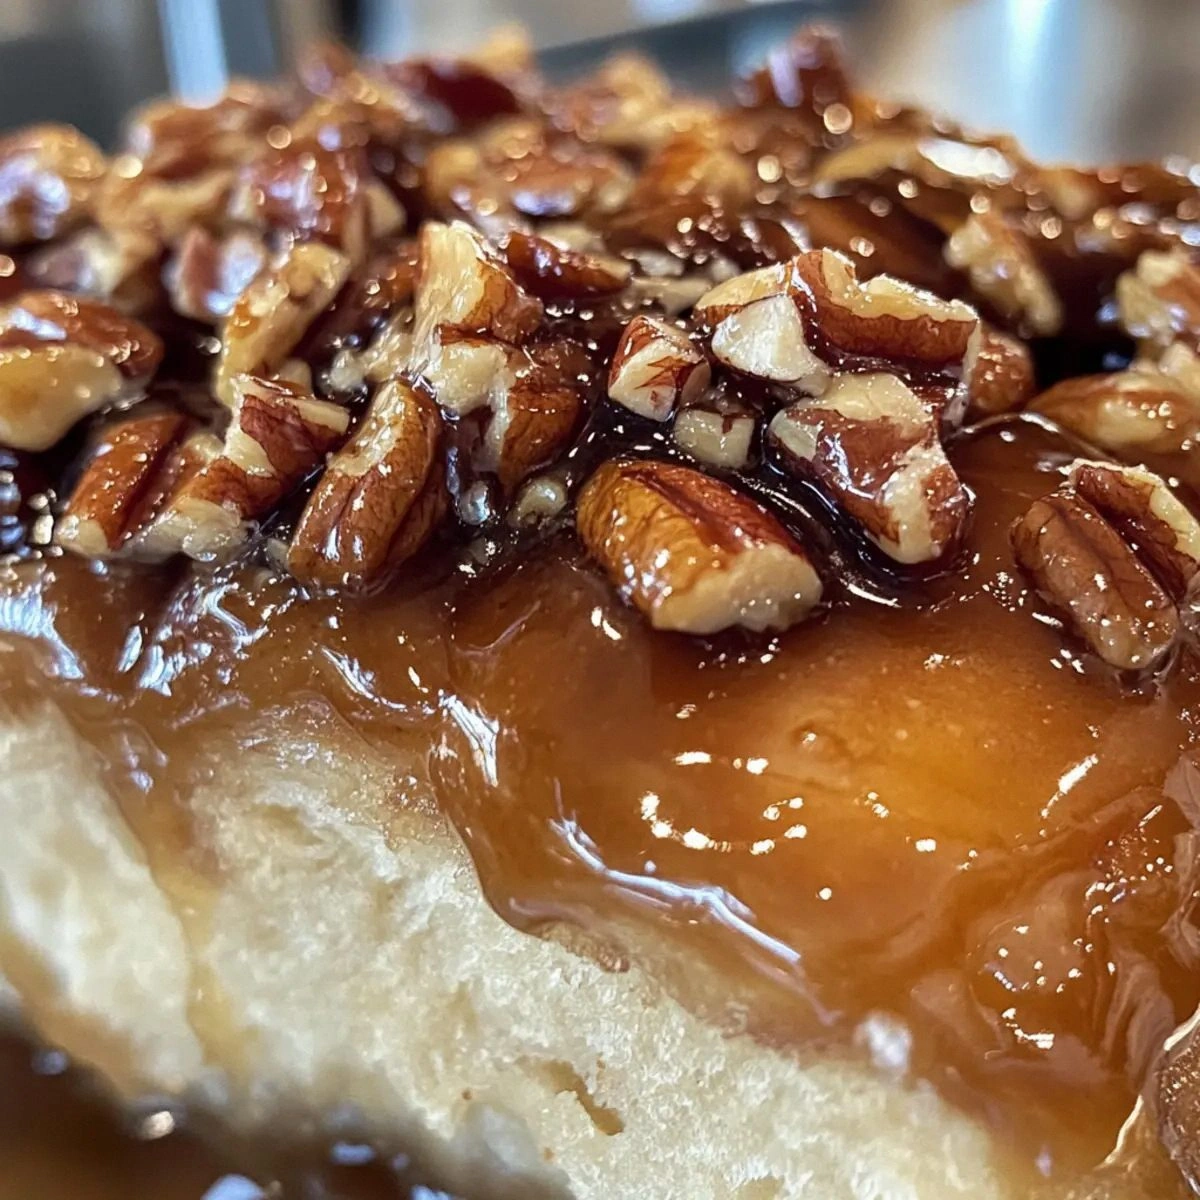
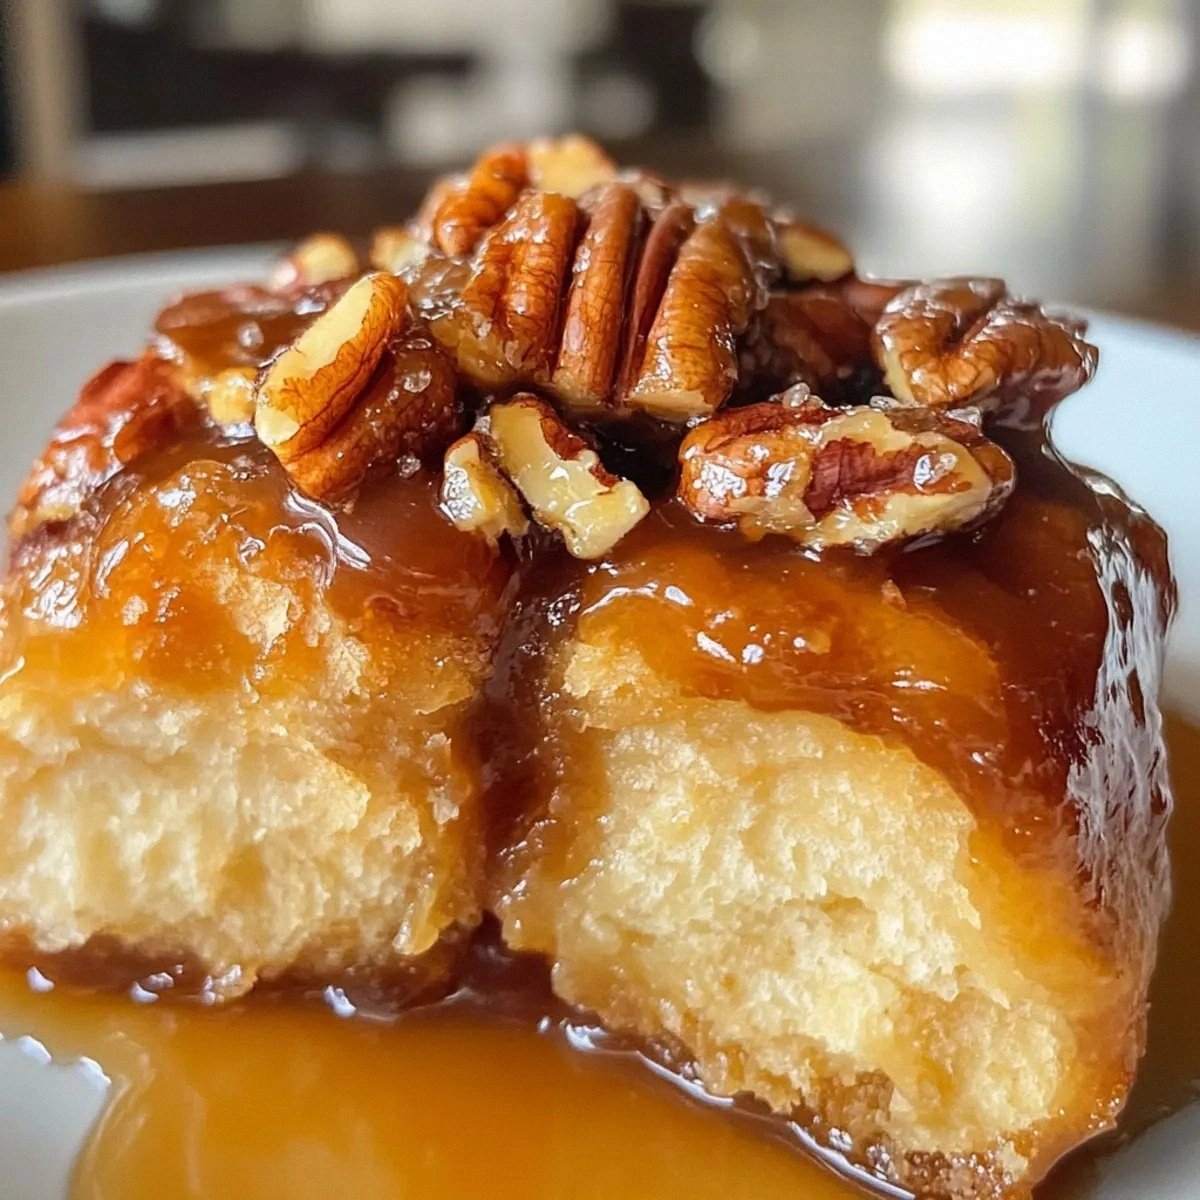
Picture this: the oven door swings open, and a golden‑brown halo of caramelized maple and toasted pecan steam rises, wrapping the entire kitchen in a scent that screams “cozy morning” louder than any alarm clock. The buns themselves are soft, pillowy clouds that give way to a sticky, buttery center that clings to every finger like a sweet, addictive secret. When you bite into one, the maple glaze coats the crumb like velvet, while the crunchy pecan bits provide that satisfying crunch that makes you pause, smile, and then dive back in for another bite.
What makes this version stand out is the marriage of classic sweet‑bun technique with a few game‑changing twists that most recipes completely miss. I’m talking about a double‑butter method that guarantees melt‑in‑your‑mouth softness, a maple‑cream glaze that stays glossy even after cooling, and a precise balance of spices that adds depth without overwhelming the maple’s natural sweetness. Most recipes get this completely wrong – they either drown the buns in syrup or leave them dry and crumbly. Here, the harmony is perfect, and the result is hands down the best version you’ll ever make at home.
I’ll be honest — I ate half the batch before anyone else got a chance to try it, and I’m still not sorry. I dare you to taste this and not go back for seconds; the combination of sweet, salty, and nutty is practically criminal. And now, ready for the game‑changer? Let me walk you through every single step — by the end, you’ll wonder how you ever made it any other way.
What Makes This Version Stand Out
- Flavor Explosion: The maple‑brown‑sugar glaze is thick enough to cling to each bun, yet it never turns gummy. It’s like a caramel dream that never loses its shine, even after cooling.
- Texture Triumph: The dough is enriched with two separate butter additions – one for the dough, one for the topping – creating a buttery crumb that’s airy on the inside and slightly crisp on the outside.
- Simplicity Meets Sophistication: Despite the luxurious taste, the ingredient list is pantry‑friendly, and the steps are broken down so even a novice can nail the technique.
- Unique Ingredient: Real maple syrup replaces cheap corn syrup, delivering a depth of flavor that store‑bought glazes simply can’t match.
- Crowd‑Pleaser: Whether it’s a family brunch, a holiday gathering, or a lazy Sunday, these buns disappear faster than you can say “one more, please.”
- Make‑Ahead Magic: The buns keep beautifully for up to three days, and a quick re‑heat brings them back to life as if they just came out of the oven.
Inside the Ingredient List
The Flavor Base
Whole milk provides the liquid backbone that hydrates the flour and activates the yeast, resulting in a tender crumb. Using a cup of whole milk instead of skim or plant‑based milks adds richness and helps the dough rise evenly. If you’re lactose‑intolerant, try a 2% milk with a splash of cream; the texture will stay just as luscious.
Sugar isn’t just for sweetness; the two tablespoons feed the yeast, giving it the energy to produce those beautiful air pockets. A pinch of extra sugar can be added if you love an even sweeter interior, but be careful – too much sugar can slow down fermentation.
Active dry yeast is the tiny miracle worker that turns this dough from a sticky mess into fluffy perfection. I always proof the yeast in warm milk with a bit of sugar for five minutes; you’ll see it foam up like a mini volcano, confirming it’s alive and ready to work.
The Texture Crew
All‑purpose flour is the canvas for this masterpiece. The four cups give the dough enough structure to hold the generous glaze without collapsing. If you want a lighter crumb, you can substitute 25% of the flour with cake flour, but keep the total weight the same.
Unsalted butter appears twice in this recipe, and that’s intentional. The first half‑cup is melted and folded into the dough, creating layers that puff up during baking. The second quarter‑cup is melted again for the topping, ensuring the glaze stays glossy and doesn’t become greasy.
Eggs act as emulsifiers, binding the fat and liquid together while adding richness. Two large eggs are enough to give the dough a silky texture without making it too heavy. If you’re avoiding eggs, try a flax‑egg mixture (1 tbsp ground flax + 3 tbsp water) for each egg.
The Unexpected Star
Maple syrup is the hero of this recipe, providing a deep, caramel‑like flavor that sugar alone can’t achieve. Half a cup is the sweet spot – enough to dominate the glaze without making it overly syrupy. For a more pronounced maple punch, drizzle a tablespoon of pure maple over the buns just before serving.
Heavy cream adds a luxurious mouthfeel to the glaze, making it smooth and velvety. A third of a cup is enough to thicken the mixture without turning it into a custard. If you’re watching calories, substitute half the cream with whole milk; the glaze will stay creamy, just a touch lighter.
Pecans bring a buttery crunch that contrasts beautifully with the soft bun. One cup of chopped pecans is toasted lightly before adding to the topping, releasing their natural oils and intensifying the nutty flavor. If you prefer almonds or walnuts, feel free to swap – the texture will stay the same, the flavor will shift.
The Final Flourish
Cinnamon and nutmeg are the spice duo that give the buns a warm, comforting aroma. Two teaspoons of cinnamon and half a teaspoon of nutmeg create a balanced profile – the cinnamon shines while the nutmeg adds a subtle earthiness.
Salt, both the teaspoon in the dough and the pinch in the glaze, is the silent hero that amplifies every other flavor. A pinch may seem trivial, but it’s essential for preventing the sweetness from becoming cloying.
Brown sugar appears twice: once in the dough and once in the topping. Its molasses content deepens the color and adds a caramel undertone that pairs perfectly with maple. If you only have white sugar, add a tablespoon of molasses to each cup of sugar to mimic the flavor.
Everything's prepped? Good. Let’s get into the real action…
The Method — Step by Step
Start by warming the whole milk to about 105°F (just warm to the touch). Add the sugar and sprinkle the active dry yeast over the surface. Let it sit for five minutes until it becomes foamy, like a tiny cloud of culinary optimism. This is the moment of truth – if it doesn’t foam, your yeast is dead and you’ll need a fresh packet.
In a large mixing bowl, whisk together the flour, salt, and the half‑cup of unsalted butter (melted but cooled). Create a well in the center and pour in the yeast mixture, the two large eggs, and the vanilla extract. Using a stand mixer on low, combine until a shaggy dough forms, then increase to medium for two minutes. Watch Out: Over‑mixing at this stage can develop too much gluten, resulting in a tough bun.
Transfer the dough to a lightly floured surface and knead for about 6‑8 minutes until it’s smooth and elastic. The dough should be slightly tacky but not stick to your hands. If it feels too dry, sprinkle a tablespoon of milk; if it’s too wet, dust with a bit more flour. This is where the texture crew really shines.
Place the dough in a greased bowl, cover with a clean kitchen towel, and let it rise in a warm spot for 1‑1½ hours, or until doubled in size. The kitchen should feel like a cozy sauna; if it’s too cold, pop the bowl in a turned‑off oven with the light on. You’ll know it’s ready when the dough springs back lightly when pressed.
While the dough rises, prepare the sticky glaze. In a saucepan, melt the quarter‑cup of unsalted butter, then stir in the cup of brown sugar, the half‑cup of maple syrup, and the heavy cream. Bring to a gentle simmer, whisking constantly until the mixture thickens slightly – it should coat the back of a spoon. Remove from heat and set aside; the aroma at this point is pure comfort.
Once the dough has risen, punch it down to release the air, then roll it out into a 12×18‑inch rectangle. Brush the surface generously with the remaining half‑cup of melted butter (the one reserved for the dough) – this ensures the filling stays moist.
Sprinkle the brown sugar (second cup), cinnamon, nutmeg, and a pinch of salt evenly over the buttered dough. Then scatter the chopped pecans across the top, pressing them lightly into the sugar‑spice mixture. This layer is the heart of the bun; don’t skimp on it.
Starting from the long edge, tightly roll the dough into a log, sealing the seam with a gentle pinch. Cut the log into 12 equal pieces (about 1‑inch thick) and place them in a greased 9×13‑inch baking dish, leaving a little space between each bun.
Pour the warm maple glaze over the arranged buns, making sure each one gets a good coating. The glaze will seep into the gaps, creating that sticky, caramelized crust we all crave. Cover the dish loosely with foil and let the buns rise again for 30 minutes – they’ll puff up a bit more.
Preheat the oven to 350°F (175°C). Once heated, remove the foil and bake the buns for 25‑30 minutes, or until the tops are a deep golden‑brown and the glaze is bubbling. That sizzle when it hits the pan? Absolute perfection.
When the timer dings, turn off the oven and let the buns sit inside for an extra five minutes. This gentle carry‑over cooking keeps the centers moist. Then, transfer the pan to a wire rack and let the buns cool just enough to handle – but not so much that the glaze hardens.
Serve warm, perhaps with a dollop of whipped cream or a drizzle of extra maple if you’re feeling extra indulgent. And now, the fun part: watch your family or friends scramble for seconds. I dare you to try resisting.
That's it — you did it. But hold on, I've got a few more tricks that'll take this to another level…
Insider Tricks for Flawless Results
The Temperature Rule Nobody Follows
Never let the milk exceed 110°F; hotter milk will kill the yeast, while cooler milk slows the rise dramatically. I keep a candy thermometer handy, and if you don’t have one, the milk should feel warm but not hot to the touch – like a comfortable bathwater.
Why Your Nose Knows Best
Your sense of smell is a better indicator of dough readiness than a timer. When the dough has risen, you’ll notice a faint yeasty aroma that’s slightly sweet. If you’re unsure, give the dough a gentle poke – if it springs back slowly, it’s perfect.
The 5‑Minute Rest That Changes Everything
After shaping the buns, let them rest uncovered for five minutes before the final bake. This short pause allows the gluten to relax, preventing the buns from shrinking in the oven. I once skipped this step and ended up with a flat, dense batch – a lesson learned the hard way.
Pecan Toasting Pro Tip
Toast pecans in a dry skillet over medium heat for 3‑4 minutes, stirring constantly. The nuts will release a nutty perfume that infuses the entire bun. If you forget, you can always pop them in the oven for a quick 5‑minute toast while the dough rises.
Maple Glaze Consistency Hack
If your glaze thickens too much before pouring, whisk in a splash of warm milk or extra cream until it reaches a pourable consistency. Too thin? Simmer a bit longer – the glaze will reduce and thicken without losing its glossy shine.
Creative Twists and Variations
This recipe is a playground. Here are some of my favorite ways to switch things up:
Apple‑Cinnamon Swirl
Swap the pecans for thinly sliced apples tossed in cinnamon and a drizzle of caramel. The apples soften during baking, creating a juicy pocket that pairs beautifully with the maple glaze.
Chocolate Hazelnut Delight
Replace the maple syrup with a chocolate‑hazelnut spread, and use chopped toasted hazelnuts instead of pecans. The result is a decadent, almost dessert‑like bun that’s perfect for brunch indulgence.
Savory Bacon & Cheddar
For a sweet‑and‑savory twist, omit the maple syrup and brown sugar, then fold crisp bacon bits and shredded cheddar into the filling. The glaze becomes a simple butter‑cream, and the buns turn into a crowd‑pleasing breakfast treat.
Pumpkin Spice Autumn
Add ¼ cup pumpkin puree to the dough and a pinch of pumpkin pie spice to the cinnamon‑nutmeg mix. The subtle pumpkin flavor melds with the maple, making these buns perfect for a crisp fall morning.
Coconut‑Lime Tropical
Swap the pecans for toasted coconut flakes and add a teaspoon of lime zest to the glaze. The bright citrus cuts through the sweetness, delivering a fresh, island‑inspired bite.
Storing and Bringing It Back to Life
Fridge Storage
Place the cooled buns in an airtight container and store them in the refrigerator for up to three days. The glaze will stay soft, and the buns retain their moisture. When you’re ready to eat, warm them in a 300°F oven for 8‑10 minutes.
Freezer Friendly
Wrap each bun individually in plastic wrap, then place them in a freezer‑safe bag. They’ll keep for up to two months. To reheat, skip the thawing step, pop them straight into a 350°F oven for 12‑15 minutes, and watch the glaze melt back to perfection.
Best Reheating Method
Add a tiny splash of water (about a tablespoon) to the bottom of the container before microwaving for 30 seconds, or before oven reheating for 5 minutes. The steam revives the bun’s softness and prevents the glaze from drying out.