I still remember the day I swore off pumpkin recipes forever. It was a rainy Tuesday in October, and I'd just pulled my third batch of hockey-puck pumpkin muffins from the oven. They looked like they'd been carved from orange concrete. My kitchen smelled like disappointment with a hint of nutmeg. I was done—ready to let the basic girls keep their pumpkin spice while I retreated to chocolate territory forever.
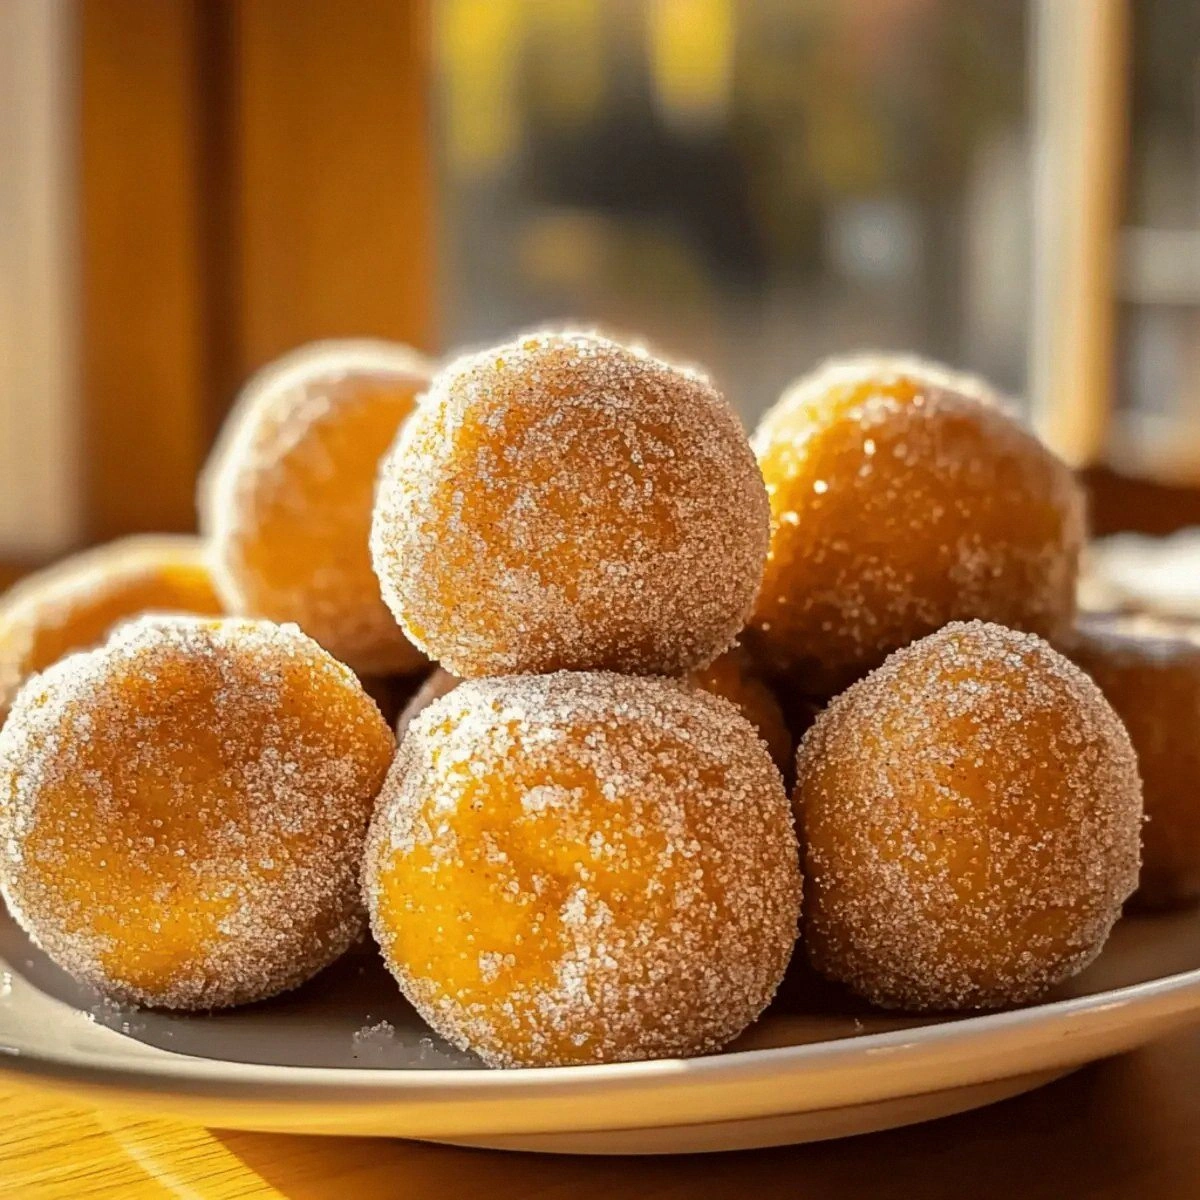
But then my neighbor showed up with these little golden spheres of heaven, and everything changed. One bite of her baked pumpkin donut holes, and I was that cartoon wolf with my eyes popping out of my head. These weren't those dense, overly sweet mall kiosk disasters that taste like someone blended a Yankee Candle into batter. No, these were light, airy, perfectly spiced, and coated in what she mysteriously called "cinnamon magic"—a blend that made my tongue do a happy dance I didn't know it knew.
Here's the thing: most pumpkin recipes fail because they treat pumpkin like it's supposed to carry the whole flavor load. That's like asking the bass player to also sing lead, play drums, and run sound. These donut holes understand that pumpkin is a team player, not a solo artist. When you balance it with the right spices, proper leavening, and that oil-to-flour ratio that took me six attempts to nail, you get these gorgeous little puffs that disappear faster than your willpower at a sample table.
Let me walk you through every single step—by the end, you'll wonder how you ever made it any other way. Trust me, I've eaten my way through enough pumpkin failures to know this one hits different. This recipe has converted even the "I hate pumpkin everything" crowd, and I'm about to make you the hero of every fall gathering, coffee date, and midnight snack attack.
What Makes This Version Stand Out
- Cloud-Level Lightness: These donut holes use a specific ratio of baking powder to baking soda that creates air pockets so perfect, they practically float off the baking sheet. Most recipes use too much leavening, creating tunnels and that weird metallic aftertaste.
- The Cinnamon Magic Coating: Forget plain cinnamon sugar. We're adding a secret ingredient that makes the coating crackle slightly when you bite in, creating a texture contrast that'll make you close your eyes involuntarily.
- No-Fry Victory: Baking instead of frying means you can eat six without feeling like you swallowed a brick, plus your house won't smell like a fast-food joint for three days.
- Pumpkin That Tastes Like Pumpkin: We're not hiding the vegetable here—we're celebrating it. The technique brings out pumpkin's natural sweetness without that weird baby food flavor.
- Monday-Morning Easy: One bowl for wet ingredients, one for dry, then combine. No creaming butter, no waiting for eggs to reach room temperature, no special equipment beyond a mini muffin pan.
- Freezer-Friendly Champions: Make a double batch, freeze half, and you've got instant autumn vibes whenever the craving hits. Thirty seconds in the microwave and they're better than fresh.
- kid-Approved, Adult-Adored: My nephew thinks they're "pumpkin cookie doughnut balls" and my book club friend asked if I could make them for her wedding. They hit that rare sweet spot of sophisticated enough for grown-ups but fun enough for the juice box crowd.
Alright, let's break down exactly what goes into this masterpiece...
Inside the Ingredient List
The Flavor Base
Pumpkin puree is the star, but not all cans are created equal. I've tested every brand from the dollar store fancy stuff to the organic stuff that costs more than a coffee shop latte. The winner? Plain old Libby's 100% Pure Pumpkin. It's consistently smooth, naturally sweet, and doesn't have that weird metallic aftertaste that makes your baked goods taste like they were made in a tin can. If you're feeling ambitious and want to roast your own sugar pumpkins, go for it—but honestly, the canned stuff is more reliable and nobody will know the difference.
The spice blend is where most recipes go wrong. They dump in a tablespoon of generic "pumpkin pie spice" and call it a day. That's like using pre-mixed perfume and expecting to smell unique. We're building our own blend with cinnamon, nutmeg, and ginger in specific ratios that make each spice identifiable without any single one screaming for attention. The ginger adds warmth without heat, the nutmeg provides that nostalgic eggnog note, and the cinnamon—well, we'll get to the cinnamon magic later.
The Texture Crew
All-purpose flour gets the job done, but here's what nobody tells you: the protein content matters more than you'd think. King Arthur flour, with its higher protein, gives these donut holes more structure and that satisfying chew. If you're using a softer flour like White Lily, you'll want to add two extra tablespoons to prevent them from spreading into sad little puddles. The flour isn't just structure—it's the canvas that holds all those warm spices against the pumpkin backdrop.
Brown sugar isn't just for sweetness—it's hygroscopic, which is a fancy way of saying it attracts and holds moisture. This keeps your donut holes tender for days instead of turning into rocks by morning. The molasses in the brown sugar also deepens the flavor, adding caramel notes that make people ask "what's that extra something?" Dark brown sugar works too, but it can overpower the pumpkin, so I stick to light for the perfect balance.
The Unexpected Star
Vegetable oil might seem boring compared to butter, but here's where science becomes delicious. Oil coats flour proteins more effectively than butter, preventing gluten development and keeping these little guys tender. Butter is only about 80% fat—the rest is water that can toughen your baked goods. Oil brings 100% fat to the party, plus it lets the spices bloom and mingle in a way butter just can't match. If you're absolutely married to butter, melt it and use it, but expect slightly denser results.
Milk isn't just liquid—it's bringing fat, protein, and natural sugars to the party. Whole milk creates the richest flavor, but 2% works fine. Skip the skim unless you want donut holes that taste like diet food, and nobody wants diet food when they're reaching for pumpkin treats. The milk combines with the baking soda to create carbon dioxide bubbles that give us lift, so don't swap it out for water unless you want hockey pucks.
The Final Flourish
Eggs are the binders, the emulsifiers, the structure builders. But here's what everyone gets wrong—cold eggs straight from the fridge can seize up your oil, creating weird lumps. Room temperature eggs blend seamlessly, creating a smooth batter that bakes evenly. If you forgot to take them out (again), submerge them in warm water for five minutes while you prep everything else.
The cinnamon sugar mixture isn't just cinnamon and sugar. We're adding a touch of salt—yes, salt—to make the sweetness pop, and a secret ingredient that creates that crackly coating. It's probably sitting in your pantry right now, wondering why you only use it for snickerdoodles. Cream of tartar is the game-changer here, creating a slight tang that makes the cinnamon taste more cinnamon-y.
Everything's prepped? Good. Let's get into the real action...
The Method — Step by Step
- Start with the spice bloom: In a small bowl, whisk together your cinnamon, nutmeg, and ginger. Now here's where it gets interesting—take half of this mixture and toast it in a dry pan over medium heat for about 90 seconds. Watch closely because spices go from fragrant to burnt faster than you can say "pumpkin spice latte." When your kitchen starts smelling like fall exploded, pull them off the heat. This toasting awakens the essential oils and creates depth you can't get from raw spices. Let them cool while you prep everything else.
- Create the wet base: In your largest bowl, whisk together the pumpkin puree, both sugars, eggs, and oil until it looks like autumn sunset. The mixture should be smooth, glossy, and slightly thick. If you see any sugar lumps, keep whisking—they'll dissolve, but not if you rush this step. This is also when you add the toasted spice blend, plus the untoasted half. The contrast between toasted and untoasted spices creates layers of flavor that make people ask for your secret.
- Bring in the leavening team: Sprinkle the baking powder, baking soda, and salt across the surface of your wet mixture. Here's what most recipes miss—let them sit for 30 seconds before mixing. This gives the chemical leavening agents time to activate properly. Now whisk until just combined. Over-mixing activates gluten, and nobody wants chewy donut holes. The batter might look slightly curdled—don't panic, that's the baking soda reacting with the acidic pumpkin.
- Flour folding finesse: Add the flour all at once, then switch to a spatula. Fold—don't stir—just until you see no dry flour pockets. The batter will be thick, almost like soft cookie dough. If it's runny like pancake batter, you've gone wrong somewhere. Thick batter means tall, proud donut holes instead of sad little puddles. This whole process should take less than 30 seconds once you start folding.
- Pan preparation perfection: Spray your mini muffin pan with non-stick spray, then dust with flour. Tap out the excess—what you're creating is a thin barrier that helps the donut holes release cleanly. If you're using a silicone pan, you can skip the flour dusting, but still use the spray. The flour creates a slight crust that helps the cinnamon magic coating adhere later. Don't use paper liners—they'll stick and rip off half your donut hole.
- Portion like a pro: Use a small cookie scoop or two spoons to fill each cavity about 3/4 full. They'll rise, but not dramatically—this isn't a muffin recipe. If you overfill, you'll get muffin tops instead of round donut holes. The batter should mound slightly above the rim of each cavity. Tap the pan gently on the counter to settle the batter and release any air bubbles.
- The bake that makes or breaks: Slide your pan into a preheated 350°F oven and set your timer for 12 minutes. Here's the thing—ovens lie. Yours might run hot, mine might run cold. Start checking at 10 minutes. The donut holes are done when the edges start pulling away from the sides and a toothpick comes out with just a few moist crumbs. They should spring back when you gently press the top. Over-baking is the enemy of tender donut holes, so err on the side of slightly underdone.
- The magic moment: While they're baking, whisk together your cinnamon magic coating. This isn't just cinnamon and sugar—we're adding a pinch of salt to make the flavors pop and that secret ingredient, cream of tartar, for tang. The ratio is crucial: too much cinnamon and it tastes like Red Hots candy, too little and it's just sweet bread. You want the coating to be generous but not overwhelming, like a cozy sweater rather than a heavy coat.
- The coating ceremony: Here's where patience pays off. Let the donut holes cool for exactly 5 minutes in the pan—any longer and they'll stick, any less and they'll fall apart. While they're cooling, melt 3 tablespoons of butter in a shallow bowl. Working quickly while they're still warm, brush each donut hole with butter (don't dunk—they'll get soggy), then roll in the cinnamon magic. The warmth helps the coating adhere, creating that crackly shell that shatters slightly when you bite in.
- The final flourish: Arrange them on a platter and watch them disappear. But here's the pro move—reserve a few for yourself before announcing they're ready. I learned this the hard way after watching two dozen vanish in under five minutes at a party. These are best warm, but they're still incredible at room temperature. The coating stays crisp for about 6 hours, then starts to absorb moisture. Not that they'll last that long anyway.
That's it—you did it. But hold on, I've got a few more tricks that'll take this to another level...
Insider Tricks for Flawless Results
The Temperature Rule Nobody Follows
Your ingredients should be at room temperature, but here's the nuance—pumpkin puree straight from the fridge is fine, but your eggs and milk need to lose their chill. Cold eggs can cause your oil to seize, creating little flecks of solidified fat that bake into weird pockets. Take everything out 30 minutes before you start, or use my impatient baker method: submerge eggs in warm water for five minutes, and microwave milk for 15 seconds. The batter comes together smoother, bakes more evenly, and rises like it's got something to prove.
Why Your Nose Knows Best
The toasting step isn't optional if you want bakery-level flavor. When spices hit a hot pan, they release volatile oils that create new aromatic compounds—chemistry in action, baby. You'll smell when they're ready: first nothing, then suddenly your kitchen smells like fall exploded. Pull them off immediately because burnt spices taste like regret. This 90-second step transforms good donut holes into legendary ones. A friend tried skipping this once—let's just say it didn't end well for her reputation as the neighborhood baking queen.
The 5-Minute Rest That Changes Everything
After mixing your batter, let it rest for exactly five minutes. This isn't about being fancy—it's science. The flour needs time to fully hydrate, the leavening agents start their chemical dance, and air bubbles rise to the surface. Your batter will thicken slightly, making it easier to portion and creating more tender results. Skip this step and you'll get donut holes with weird air pockets and uneven texture. Set a timer and use those five minutes to prep your pans and make the cinnamon coating.
The Storage Secret That Stays Secret
Here's what nobody tells you: these actually improve after a few hours. The flavors meld, the spices bloom, and the texture settles into something magical. Store them in an airtight container with a small piece of bread—the bread absorbs excess moisture, keeping your coating crisp. They'll stay fresh for three days, though I've never seen them last more than 24 hours. If you need to refresh them, pop them in a 300°F oven for five minutes. The coating re-crispifies, and they taste fresh-baked.
Creative Twists and Variations
This recipe is a playground. Here are some of my favorite ways to switch things up:
Maple Glazed Pumpkin Dreams
Skip the cinnamon coating and instead make a quick maple glaze. Whisk together 1 cup powdered sugar with 2 tablespoons real maple syrup and 1 tablespoon milk. Dip the warm donut holes and let them set for 10 minutes. The maple plays beautifully with pumpkin without overwhelming it. Add a pinch of flaky salt on top for that sweet-salty thing that makes people make involuntary happy noises.
Chocolate Chip Pumpkin Clouds
Fold 1/2 cup mini chocolate chips into the batter just before portioning. Use the regular cinnamon coating—the chocolate-pumpkin-spice combo tastes like someone bottled autumn comfort. Don't use regular chips—they're too heavy and sink to the bottom. Mini chips distribute evenly and give you little pockets of chocolate in every bite without overwhelming the delicate pumpkin flavor.
Spiced Chai Pumpkin Holes
Replace the individual spices with 2 teaspoons of crushed cardamom pods, 1 teaspoon ground cardamom, and 1/2 teaspoon black pepper. The cardamom adds this incredible floral note that makes people ask "what am I tasting?" in the best way. For the coating, add crushed cardamom to your cinnamon sugar. They taste like fall in Mumbai and will make your house smell like a spice market.
Cream Cheese Filled Surprises
Pipe in a cream cheese filling after baking. Beat 4 oz cream cheese with 2 tablespoons powdered sugar and 1/2 teaspoon vanilla. Use a small piping tip to inject filling into the cooled donut holes. The tangy cream cheese plays against the sweet pumpkin cake in a way that makes grown adults fight over the last one. Warning: these are dangerously addictive and have been known to cause family disputes.
Coconut Pumpkin Paradise
Replace 1/4 cup of the flour with unsweetened coconut flakes, and use coconut oil instead of vegetable oil. Roll the finished donut holes in coconut sugar mixed with cinnamon. The coconut adds this subtle tropical note that makes the pumpkin taste more pumpkin-y somehow. It's like fall vacation in your mouth—cozy but with a beachy twist that works surprisingly well.
Bourbon Pumpkin Grown-Up Version
Add 2 tablespoons bourbon to the wet ingredients and reduce the milk by 2 tablespoons. The alcohol bakes off, leaving behind these incredible vanilla and caramel notes that make the pumpkin taste more sophisticated. Use dark brown sugar instead of light for deeper flavor. These are perfect for adult gatherings where you want to serve something homemade but impressive.
Storing and Bringing It Back to Life
Fridge Storage
Don't refrigerate these unless you enjoy sadness and soggy coatings. The fridge creates condensation that turns your beautiful crackly exterior into a sticky mess. Keep them in an airtight container at room temperature for up to 3 days. If your kitchen is humid, add a small packet of silica gel (the kind that comes in shoe boxes) to the container—it absorbs excess moisture without touching your food.
Freezer Friendly
These freeze like champions. Let them cool completely, then arrange in a single layer on a baking sheet. Freeze for 2 hours, then transfer to freezer bags. They'll keep for 2 months, though I don't know why you'd wait that long. To reheat, microwave for 20-30 seconds or bake at 300°F for 8 minutes. The microwave is faster but can make them slightly rubbery if you overdo it. The oven takes longer but restores them to near-fresh glory.
Best Reheating Method
For maximum resurrection, use a two-step method. Microwave for 15 seconds to warm through, then pop in a 350°F oven for 3 minutes. This combo warms the interior and re-crispifies the exterior. Add a tiny splash of water before reheating—it steams back to perfection. If you're reheating from frozen, add 2 minutes to the oven time. Never reheat the cinnamon coating—it'll burn and taste bitter. If they need more coating, brush with melted butter and roll in fresh cinnamon sugar.