Picture this: you’re standing in your kitchen at midnight, the fridge light humming like a lighthouse, and a sudden craving for something that feels like a hug in cookie form hits you out of nowhere. I’ve been there, staring at a half‑empty jar of Biscoff spread and wondering why the universe refuses to give me a simple, no‑fuss dessert that doesn’t require a pantry raid. Most cookie recipes I’ve tried either demand a laundry list of obscure spices or end up as hard as a brick, leaving me with a plate of disappointment and a lingering sense that I’ve wasted my time. That’s when I decided to strip everything down to the bare essentials and see if magic could happen with just three ingredients.
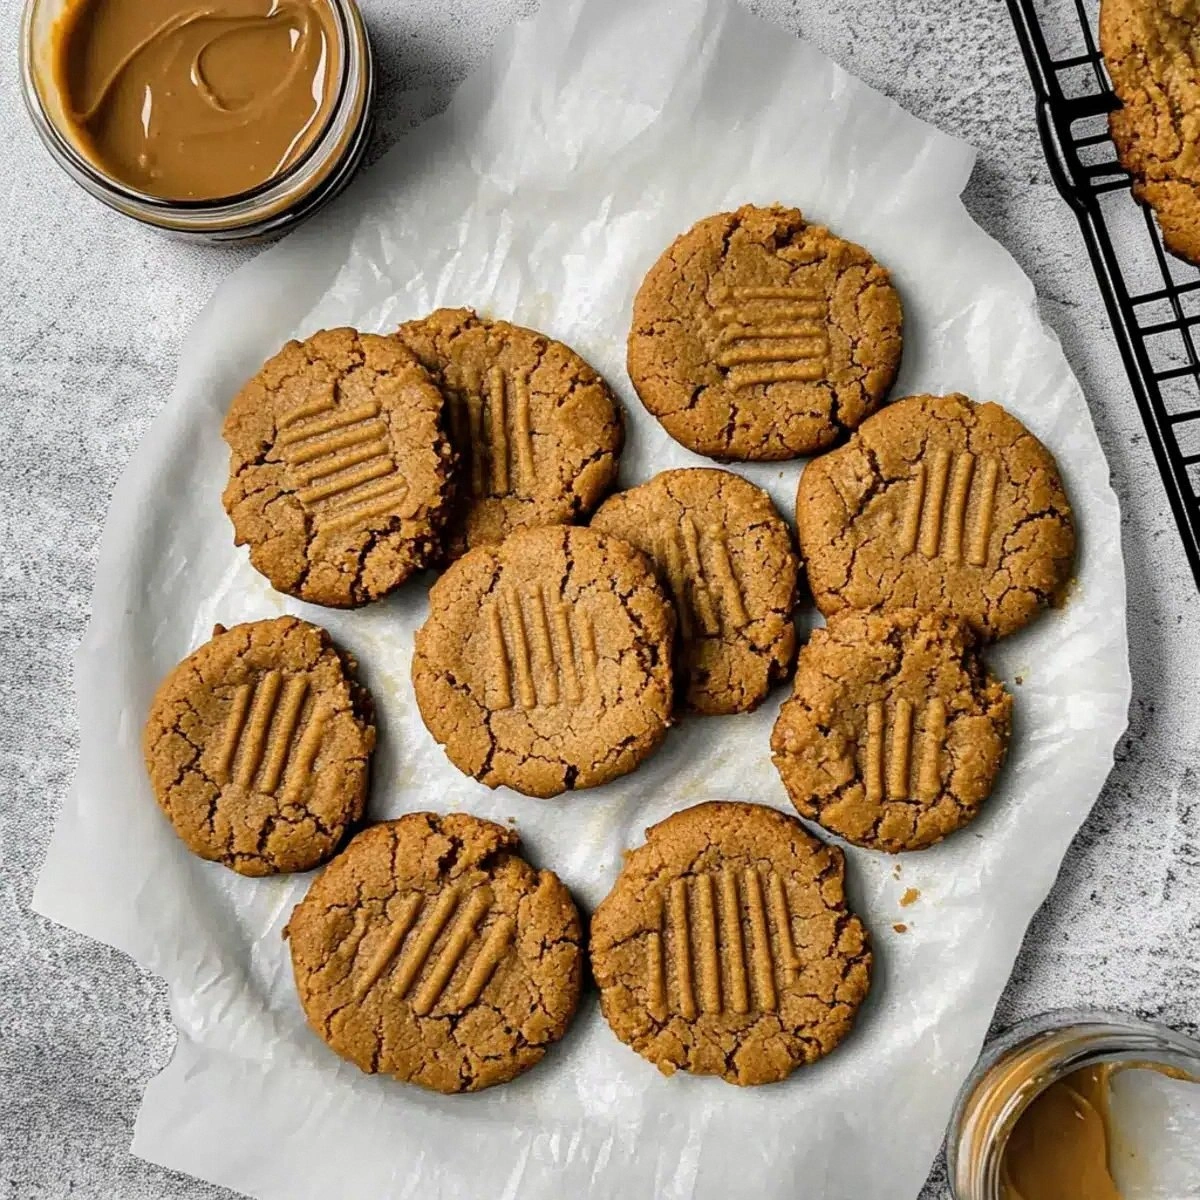
The moment I mixed the silky Biscoff spread with a beaten egg and a cup of flour, the kitchen filled with a scent that was simultaneously buttery, caramel‑laden, and whisper‑soft, like a fresh‑baked bakery window on a rainy day. The batter was glossy, almost mischievously smooth, and as I spooned it onto the parchment, I could hear the faint sigh of the dough settling into place. When the cookies finally emerged from the oven, they were golden‑brown at the edges, yet still unbelievably tender in the center—so soft that a gentle press would make them give way like a plush pillow.
Now, I’m not just bragging; I’m daring you. I dare you to taste this and not go back for seconds. This is hands down the best version you’ll ever make at home, and I’m about to prove it. Most recipes get this completely wrong—over‑mixing, over‑baking, or adding unnecessary ingredients that mask the star of the show: the Biscoff spread. Here’s what actually works: a simple technique that ensures every bite is a melt‑in‑your‑mouth experience, and a secret ingredient that most people overlook (hint: it’s already in your pantry).
Let me walk you through every single step — by the end, you’ll wonder how you ever made it any other way. Okay, ready for the game‑changer? This next part? Pure magic.
What Makes This Version Stand Out
- Flavor: The caramel‑spice notes of Biscoff dominate, giving each bite an instant comfort‑food vibe without any added sugar.
- Texture: A chewy, pillow‑soft interior with a whisper of a crisp edge, achieving the perfect contrast in a single bite.
- Simplicity: Only three ingredients, no measuring cups for spices, no confusing steps—just mix, shape, bake.
- Uniqueness: Using an egg as the sole binder lets the spread stay silky, creating a dough that spreads just enough for that coveted soft center.
- Crowd Reaction: People who try these will ask for the recipe before they even finish the first cookie—instant fan club material.
- Ingredient Quality: A good Biscoff spread (the kind that doesn’t separate) makes the difference between “good” and “god‑like.”
- Cooking Method: Baking at a moderate temperature preserves moisture while giving the edges a gentle caramelization.
- Make‑Ahead Potential: Freeze the dough balls, and you’ve got a ready‑to‑bake stash for any spontaneous snack attack.
Inside the Ingredient List
The Flavor Base
The star of the show is the Biscoff spread. This caramel‑spiced, cookie‑butter hybrid brings a depth of flavor that plain butter simply can’t match. It’s thick enough to coat the flour like velvet, yet fluid enough to blend with the egg without any gritty pockets. If you skip it, you’ll end up with a bland, generic cookie that lacks that signature warmth. For the best results, choose the original Biscoff spread (the one in the iconic orange jar) and give it a quick stir before measuring to ensure it’s homogeneous.
The Texture Crew
The egg, beaten until frothy, acts as the sole leavening and binding agent. Its proteins coagulate just enough during baking to hold the cookies together while still keeping the interior moist. If you replace it with a flax egg, you’ll lose that delicate chewiness and end up with a denser crumb. The egg also adds a subtle richness that balances the spiciness of the spread.
The Final Flourish
All‑purpose flour provides structure without overwhelming the delicate flavor profile. One cup is all you need; any more and the cookies become cakey, any less and they’ll spread into a thin, crunchy sheet. When measuring, spoon the flour into the cup and level it off—don’t tap the cup, or you’ll pack it and end up with a tougher texture.
Swaps and Alternatives
If you’re allergic to eggs, a single large egg can be swapped for ¼ cup of unsweetened applesauce, but expect a slightly fruitier note and a marginally less airy crumb. For a gluten‑free version, use a 1‑to‑1 cup gluten‑free all‑purpose blend; just ensure it contains xanthan gum for structure. Want a deeper caramel flavor? Add a teaspoon of melted dark caramel sauce to the Biscoff spread before mixing.
Everything's prepped? Good. Let's get into the real action...
The Method — Step by Step
Preheat your oven to 350°F (175°C). While the oven warms up, line two baking sheets with parchment paper. This step is crucial because the paper prevents sticking and gives the cookies a uniform bottom color. I dare you to skip this and watch the disaster unfold—sticking, uneven browning, and a lot of frustration.
In a medium bowl, pour the entire cup of Biscoff spread. Use a silicone spatula to scrape every last bit from the jar; that last spoonful contains the most intense flavor. Add the beaten egg and whisk vigorously until the mixture becomes a glossy, homogeneous ribbon. You’ll notice it thickens slightly—this is the magic binding phase.
Gradually sift the cup of all‑purpose flour over the Biscoff‑egg mixture. Sprinkle it in a slow, steady stream while folding with the spatula. This gentle incorporation prevents over‑mixing, which could develop gluten and make the cookies tough. The dough should look slightly shaggy at first, then come together into a soft, pliable ball.
Cover the bowl with plastic wrap and chill the dough in the refrigerator for exactly 15 minutes. This cooling period is the secret sauce that ensures the cookies retain their shape and stay soft. If you’re impatient, you’ll notice the dough spreading too thin, resulting in a crisp edge that shatters like thin ice.
Once chilled, scoop the dough with a tablespoon or a small ice‑cream scoop (about 1‑1½ tablespoons per cookie). Place the balls onto the prepared parchment, spacing them roughly 2 inches apart. Press each ball down lightly with the back of a spoon—just enough to flatten them a touch, but not so much that they lose their fluffy interior.
Slide the sheets into the pre‑heated oven and bake for 12‑14 minutes. The edges should turn a light golden brown while the centers stay soft and slightly puffy. Keep a close eye on them; the scent will change from sweet caramel to a toasted aroma that signals perfection. If you see the tops cracking, you’ve baked them a second too long.
Remove the cookies from the oven and let them rest on the baking sheet for 3 minutes. This short rest allows the residual heat to finish cooking the centers without drying them out. Then transfer them to a wire rack to cool completely. The moment they hit the rack, you’ll hear a faint, satisfying sigh—proof that they’re still soft inside.
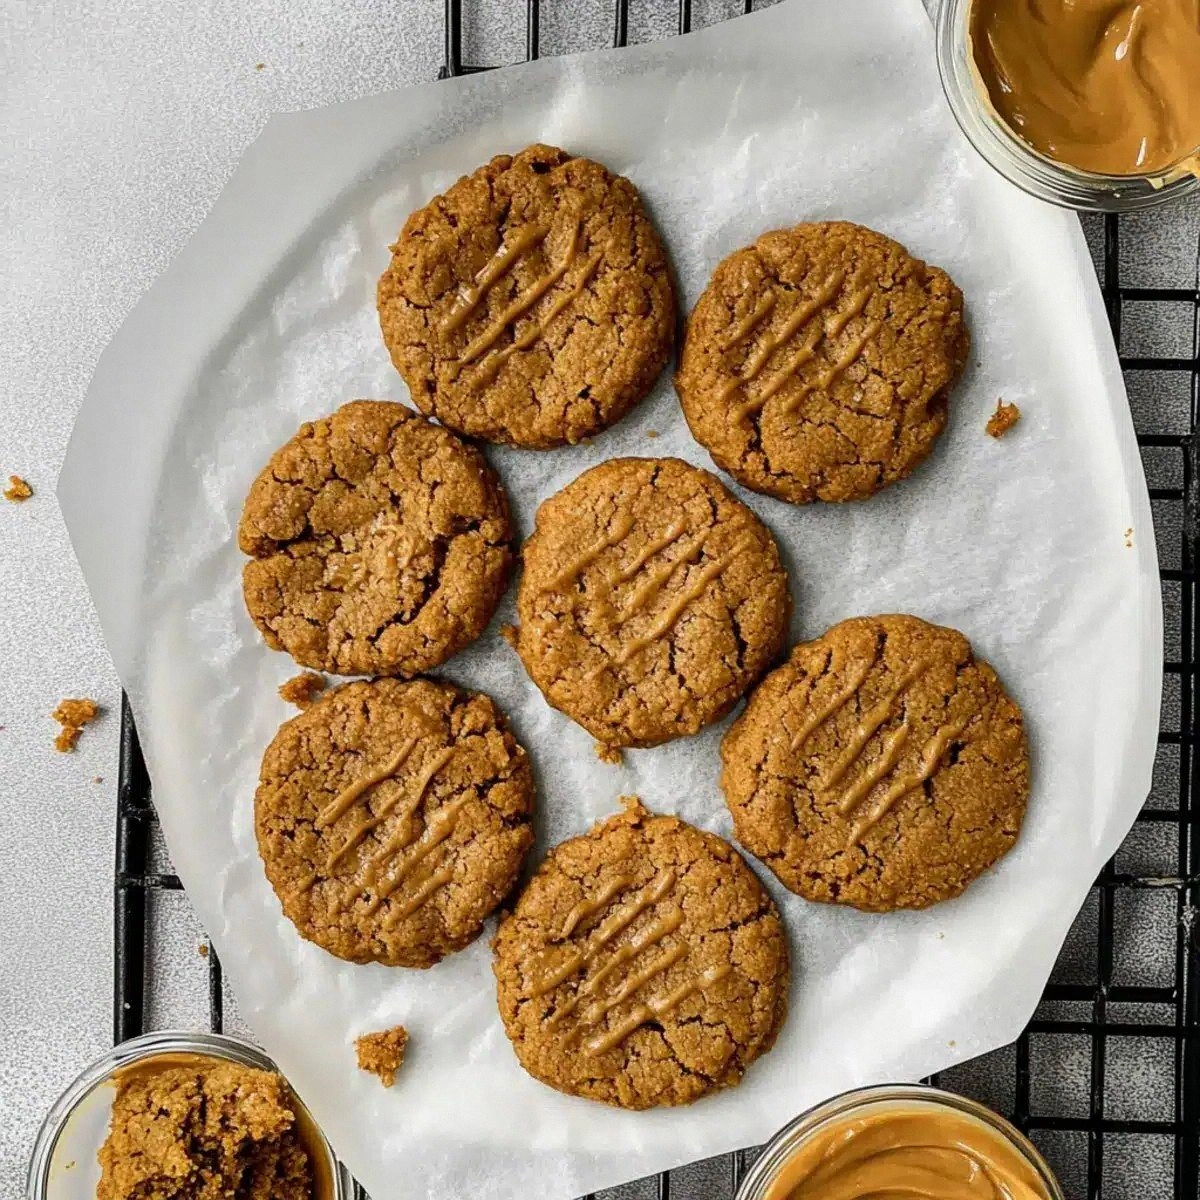
Serve warm with a glass of cold milk, or let them cool completely and store in an airtight container. I’ll be honest — I ate half the batch before anyone else got to try it, and the rest stayed soft for days. Picture yourself pulling this out of the oven, the whole kitchen smelling incredible, and the first bite melting like butter on toast.
That's it — you did it. But hold on, I've got a few more tricks that'll take this to another level...
Insider Tricks for Flawless Results
The Temperature Rule Nobody Follows
Never bake these cookies straight from a warm kitchen. Let the dough sit at room temperature for a few minutes after chilling, then pop it into a fully preheated oven. This temperature differential ensures the edges set quickly while the center stays soft. A friend once tried baking them straight from the freezer; the result was a hard, crunchy disc that no one wanted to eat.
Why Your Nose Knows Best
Rely on scent, not just the timer. When the cookies start to emit a deep, caramel‑nut aroma, you’re within seconds of perfection. If you wait for the timer to hit 14 minutes blindly, you risk over‑baking. Trust that nose—it’s the most reliable gauge for soft‑centered cookies.
The 5‑Minute Rest That Changes Everything
After baking, let the cookies rest on the sheet for exactly five minutes before moving them. This short pause lets the interior finish setting without losing moisture. Skipping this step leads to cookies that crumble when you try to lift them, ruining that coveted melt‑in‑your‑mouth texture.
Cold Butter, Warm Oven—A Contradiction That Works
Even though we’re using Biscoff spread, the principle of cold fat still applies. The chilled dough keeps the spread from liquefying too much, which would cause spreading. This is why the 15‑minute chill is non‑negotiable; it’s the quiet hero behind every perfect cookie.
Layering Flavors With a Twist
If you want a subtle depth, add a half‑teaspoon of vanilla extract to the beaten egg before mixing. It won’t overpower the spice of the Biscoff, but it will round out the flavor profile, making each bite feel more complex. I tried this once and the cookies felt like a warm hug from a grandma who also happens to be a pastry chef.
Creative Twists and Variations
This recipe is a playground. Here are some of my favorite ways to switch things up:
Chocolate Swirl Delight
After mixing the dough, fold in ¼ cup of mini chocolate chips. The chips melt slightly during baking, creating pockets of molten chocolate that contrast beautifully with the caramel‑spiced base. Perfect for anyone who can’t decide between chocolate and spice.
Cinnamon Sugar Crunch
Before baking, sprinkle a mixture of cinnamon and raw sugar on top of each cookie. The sugar caramelizes in the oven, forming a thin, crackly crust that adds a sweet crunch without overwhelming the soft interior.
Nutty Boost
Stir in ¼ cup of finely chopped toasted hazelnuts or almonds. The nuts add a buttery crunch and a subtle nutty flavor that complements the Biscoff’s spice profile. Great for those who love texture contrast.
Espresso Infusion
Mix a teaspoon of instant espresso powder into the Biscoff spread before adding the egg. The coffee notes deepen the caramel flavor, making these cookies an ideal accompaniment to an afternoon latte.
Holiday Spice Edition
Add a pinch of ground ginger, cloves, and nutmeg to the flour before mixing. This creates a festive version that’s perfect for holiday gatherings, evoking memories of mulled wine and warm fires.
Gluten‑Free Freedom
Swap the all‑purpose flour for a 1‑to‑1 gluten‑free blend that includes xanthan gum. The texture remains soft, and you can serve these to guests with gluten sensitivities without any compromise.
Storing and Bringing It Back to Life
Fridge Storage
Place the cooled cookies in an airtight container and store them in the refrigerator for up to five days. The cool environment keeps the moisture locked in, preserving that pillowy interior. If you notice them drying out, pop a slice of fresh apple in the container for a few hours—it’ll re‑humidify the cookies.
Freezer Friendly
For longer storage, freeze the dough balls on a parchment‑lined tray. Once solid, transfer them to a zip‑top freezer bag. They’ll keep for up to three months. When you’re ready, bake them straight from frozen, adding an extra minute to the bake time.
Best Reheating Method
To revive day‑old cookies, preheat your oven to 300°F (150°C), place the cookies on a baking sheet, and add a tiny splash of water (about a teaspoon) to the tray—then cover loosely with foil. The steam created will bring back that soft, melt‑in‑your‑mouth texture in just five minutes.