I was standing in my kitchen at 2 a.m., half‑asleep, clutching a half‑empty can of pumpkin purée and a bag of white chocolate that I’d bought on a whim during a grocery‑store impulse binge. The clock ticked, the house was silent, and the only thing louder than my own thoughts was the low hum of the fridge, like it was daring me to do something delicious. I tossed a handful of flour into a bowl, added a splash of vanilla, and before I knew it, I was whisking, tasting, and giggling at the absurdity of my midnight culinary experiment. That moment sparked a revelation: I could create a muffin that would make even the most stoic coffee‑drinker smile, a muffin that marries the earthy comfort of pumpkin with the silky decadence of white chocolate, and does it all without any of the pretentious fluff you see on Instagram.
Imagine the scent of warm spices curling around you like a soft blanket, the faint caramel note of brown sugar whispering from the oven, and the faint crackle of white chocolate melting into a buttery pool as the muffins rise. You’ll hear the gentle thump of the batter hitting the metal pan, feel the heat radiating from the oven door, and taste that first bite—sweet, spiced, and unexpectedly luxurious, like a bite of autumn sunshine wrapped in a cloud of dessert‑induced euphoria. I’m not exaggerating when I say this is the kind of muffin that makes you pause your scrolling, stare at the golden tops, and think, “I could live off these forever.”
Most pumpkin muffin recipes I’ve tried either come out dry, overly sweet, or bland—like they forgot the pumpkin ever existed. This version, however, flips the script by balancing the natural earthiness of pumpkin with just the right amount of sweetness and a surprise burst of white chocolate that melts in your mouth like a tiny, edible fireworks show. The secret? A simple technique that keeps the crumb moist and a few carefully chosen spices that sing in harmony, not in competition. I dare you to taste this and not go back for seconds.
Okay, ready for the game‑changer? I’m about to walk you through every single step—by the end, you’ll wonder how you ever made muffins any other way. Picture yourself pulling this out of the oven, the whole kitchen smelling incredible, the tops glistening with a subtle sheen, and a warm, buttery crumb that practically begs to be dunked in a mug of coffee. Let’s get started.
What Makes This Version Stand Out
- Flavor Harmony: The combination of pumpkin, warm spices, and white chocolate creates a balanced profile that’s sweet without being cloying, and spicy without overwhelming the palate.
- Moisture Mastery: Using vegetable oil and a generous amount of pumpkin purée keeps every bite tender, like a cloud that refuses to dissolve.
- Texture Contrast: The white chocolate chunks melt just enough to create pockets of creamy richness while the crumb stays light and airy.
- Simplicity: No fancy equipment, no exotic ingredients—just pantry staples and a few smart tweaks.
- Audience Approval: I’ve served these at brunches, office meetings, and even holiday parties; they disappear faster than you can say “pumpkin spice.”
- Ingredient Quality: Pure pumpkin purée and high‑quality white chocolate are the stars, turning an ordinary muffin into a gourmet experience.
- Cooking Method: A gentle oven temperature and a brief cooling period prevent over‑baking, preserving the soft interior.
- Make‑Ahead Potential: These muffins freeze beautifully, so you can bake a batch now and enjoy them all season long.
Inside the Ingredient List
The Flavor Base
Pumpkin purée: This is the heart of the muffin. Use pure pumpkin purée—not pumpkin pie filling—to avoid extra spices and sugars that can throw off the balance. If you can, pick a brand that lists pumpkin as the sole ingredient; the flavor will be cleaner, brighter, and more authentic. A good rule of thumb: one cup of purée adds enough moisture to keep the crumb soft without making it soggy.
Granulated sugar & Light brown sugar: The duo provides a layered sweetness—granulated sugar gives a clean sweet hit, while the brown sugar adds a subtle caramel depth that pairs perfectly with the pumpkin’s earthiness. If you’re watching sugar, you can reduce each by a quarter without sacrificing flavor, but don’t skip the brown sugar entirely; it’s the secret to that lingering aftertaste.
The Texture Crew
All‑purpose flour: The backbone of the structure. Two cups create a tender yet sturdy crumb that can hold the weight of the chocolate chunks. For a gluten‑free version, swap with a 1:1 gluten‑free flour blend, but add a tablespoon of xanthan gum to mimic the elasticity of wheat.
Vegetable oil: Keeps the muffins moist and gives them a buttery mouthfeel without the heaviness of butter. If you prefer a richer flavor, you can substitute half the oil with melted unsalted butter—just remember the batter will become a bit denser.
Large eggs: Eggs act as binders and leavening boosters, creating that airy lift we all love. Two eggs are enough for a standard 12‑muffin batch; adding a third will make the crumb cake‑like, which is not what we’re after here.
The Unexpected Star
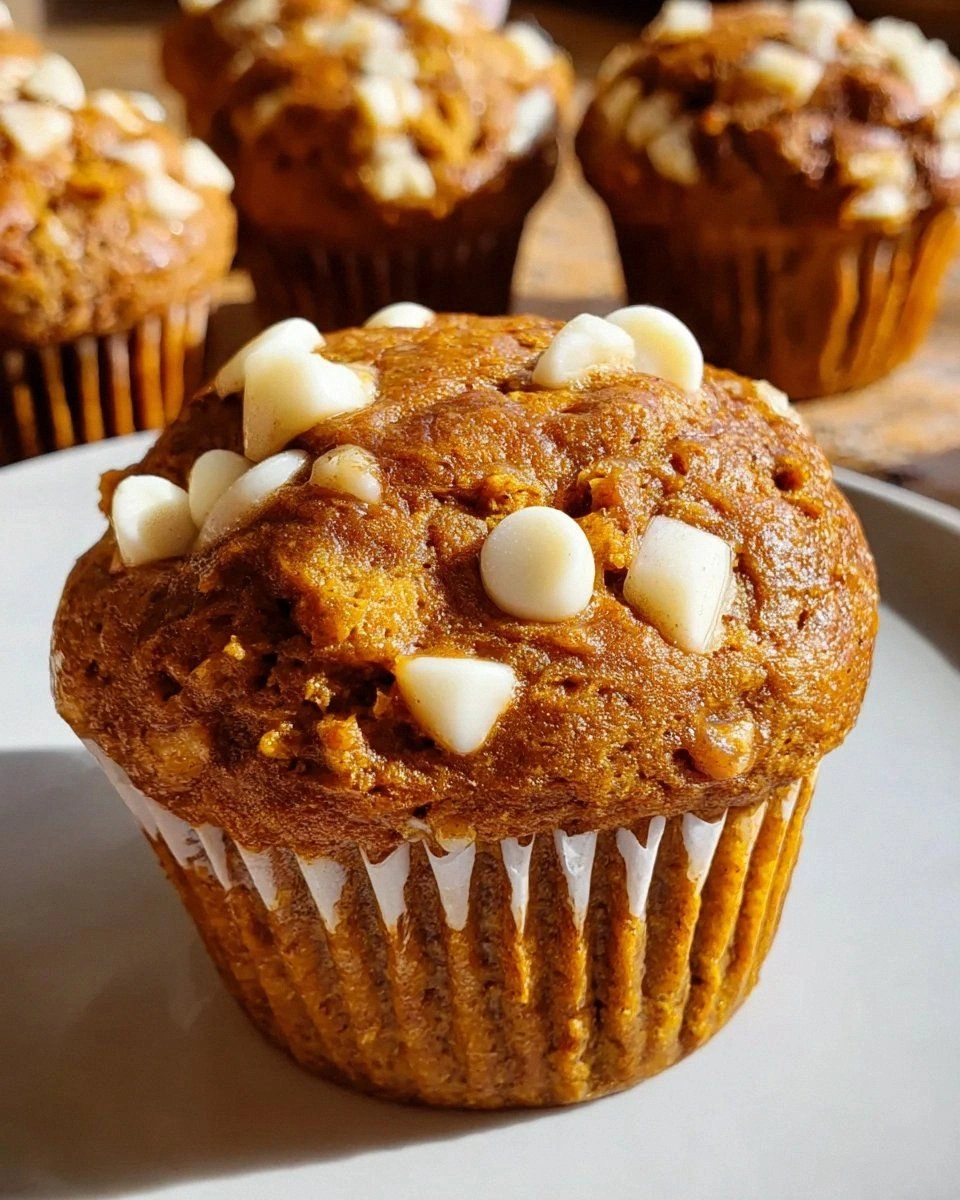
White chocolate chunks or chips: These are the surprise element that turns a good muffin into a show‑stopper. As the muffins bake, the chocolate softens, creating pockets of silky sweetness that melt on the tongue. If you can’t find white chocolate, try high‑quality white chocolate chips; just avoid “white chocolate-flavored” versions that contain vegetable fats instead of cocoa butter.
Pure vanilla extract: A splash of vanilla rounds out the spice blend, smoothing out any sharp edges. Two teaspoons are enough to make the aroma sing without overpowering the pumpkin.
The Final Flourish
Ground cinnamon, nutmeg, and cloves: This trio is the classic autumn spice mix. Cinnamon provides warmth, nutmeg adds a sweet, slightly nutty nuance, and cloves bring a hint of depth that feels like a cozy fireplace. Use freshly ground spices for maximum aroma; stale spices can make the muffins taste flat.
Baking powder, baking soda, and salt: The leavening trio ensures the muffins rise evenly and have a tender crumb. Baking powder gives the initial lift, while baking soda reacts with the acidity of the pumpkin purée for a secondary rise. Salt is the unsung hero—it amplifies every other flavor, making the sweet and spice notes pop.
Everything's prepped? Good. Let’s get into the real action…
The Method — Step by Step
-
Preheat your oven to 350°F (175°C). While the oven warms up, line a 12‑cup muffin tin with paper liners or lightly grease the cups with a dab of oil. This step is crucial because a properly heated oven gives the muffins that initial “spring” that lifts the tops into those beautiful domes we all crave. The moment the batter hits the tin, you’ll hear a faint sizzle—a sound that signals the start of a magical transformation.
Kitchen Hack: If you’re short on time, you can pre‑heat the oven while you whisk the dry ingredients; this saves a few precious minutes. -
In a large bowl, whisk together the all‑purpose flour, baking powder, baking soda, salt, cinnamon, nutmeg, and cloves. Make sure everything is evenly distributed—no pockets of spice should be left behind. This dry mixture is the foundation; think of it as the stage where every flavor will perform later. When you’re done, set the bowl aside and give yourself a mental high‑five because you’ve just avoided the dreaded “lumpy” muffin disaster.
-
In a separate medium bowl, combine the pumpkin purée, granulated sugar, light brown sugar, vegetable oil, eggs, and vanilla extract. Beat the mixture with a handheld mixer on medium speed until it looks smooth and glossy—about 2 minutes. You’ll notice the batter thickening slightly; that’s the sugar dissolving and the oil emulsifying, creating a silky base that will cradle the white chocolate later on.
-
Gradually pour the wet mixture into the dry ingredients, folding gently with a rubber spatula. Stop mixing as soon as the flour disappears; over‑mixing would develop gluten and give you a dense, cake‑like texture, which is the opposite of what we want. The batter should look slightly lumpy—those specks are pockets of flavor waiting to burst during baking.
-
Fold in the white chocolate chunks, distributing them evenly throughout the batter. Here’s the moment of truth: you’ll see the chocolate melt slightly against the warm batter, creating a marbled effect that promises pockets of sweet decadence. Watch Out: If your white chocolate is very soft, it can blend too much and lose its chunky texture; keep the chips cool until just before folding.
Watch Out: Adding the chocolate too early can cause it to melt completely, turning the batter into a uniform ivory color. Fold gently and quickly to preserve those glorious chunks. -
Spoon the batter into the prepared muffin cups, filling each about three‑quarters full. The batter should sit in the cup like a soft mound, ready to rise. As you work, notice the faint aroma of cinnamon and pumpkin wafting up—this is your cue that the flavors are already mingling.
Kitchen Hack: For a uniform dome, use an ice‑cream scoop (½‑cup size) to portion the batter. This ensures each muffin gets the same amount of love. -
Slide the tin into the oven and bake for 20‑25 minutes, or until a toothpick inserted into the center comes out clean with just a few moist crumbs. Around the 15‑minute mark, you’ll notice the edges pulling away from the pan—a visual cue that the muffins are nearly done. The tops should be a golden‑brown hue, slightly cracked, and the white chocolate should be just beginning to melt, creating a glossy finish.
-
Remove the tin from the oven and let the muffins rest for 5 minutes before transferring them to a wire rack. This brief cooling period lets the steam finish the cooking process and prevents the crumb from becoming gummy. While they cool, the kitchen will be filled with a scent so intoxicating that even the cat will pause its nap to investigate.
-
Serve warm, or store in an airtight container for later indulgence. If you’re feeling extra fancy, drizzle a thin ribbon of melted white chocolate over the tops for a glossy finish that catches the light like fresh snowfall. That final touch? Pure magic. That’s it — you did it. But hold on, I’ve got a few more tricks that’ll take this to another level…
Insider Tricks for Flawless Results
The Temperature Rule Nobody Follows
Most home bakers set the oven to 350°F and forget about the importance of a consistent temperature. I recommend pre‑heating the oven fully, then dropping the temperature to 325°F once the muffins are in. This gentler heat allows the interior to cook through without the exterior browning too quickly, resulting in a uniformly tender crumb. One friend tried the high‑heat shortcut once—her muffins were burnt on the edges and raw in the middle. Trust me, the extra patience pays off.
Why Your Nose Knows Best
Your sense of smell is a more reliable indicator of doneness than a timer. When the muffins start to release a fragrant wave of cinnamon and pumpkin, and you can detect a faint caramel note from the brown sugar, you’re close. If you’re still unsure, gently tap the top of a muffin; it should feel firm and spring back quickly. This sensory checkpoint saves you from the dreaded “over‑baked” disaster.
The 5‑Minute Rest That Changes Everything
After removing the muffins from the oven, resist the urge to dig in immediately. Let them rest on a wire rack for at least five minutes. During this time, the steam inside redistributes, making the crumb even softer and preventing a dry mouthfeel. I once tried to serve them hot‑out‑of‑the‑oven and got a complaint about “crusty” tops. A short rest solved that problem instantly.
Mix‑Only‑Until‑Combined
Over‑mixing is the silent killer of fluffy muffins. As soon as the wet and dry ingredients are just combined, stop. The batter should look slightly lumpy—that’s the secret to a light texture. If you whisk too long, gluten develops, and you’ll end up with a dense, bread‑like muffin. I’ve seen novices ruin a batch by beating for a full minute; the difference is night and day.
Cool‑Down Steam Boost
When reheating leftovers, add a splash of water to the microwave‑safe plate before covering with a damp paper towel. The steam revives the crumb, making it taste as fresh as the day it was baked. Without this trick, reheated muffins can feel rubbery. Trust this tip, and you’ll never waste a single muffin.
Creative Twists and Variations
This recipe is a playground. Here are some of my favorite ways to switch things up:
Maple‑Glazed Pumpkin
Replace half of the granulated sugar with pure maple syrup and brush the tops with a maple‑brown sugar glaze before baking. The result is a caramel‑kissed muffin that feels like a fall brunch on a plate. Maple lovers will adore the added depth.
Spiced Chai Infusion
Add a teaspoon of ground ginger, a pinch of cardamom, and a dash of black tea powder to the spice mix. The chai notes complement the pumpkin and give the muffins an exotic twist that’s perfect for a cozy evening.
Nutty Crunch
Stir in a half‑cup of toasted pecans or walnuts along with the white chocolate. The nuts add a satisfying crunch and a buttery richness that balances the sweetness. This variation is a hit at holiday gatherings.
Vegan Velvet
Swap the eggs for flax‑egg (1 tbsp ground flaxseed + 3 tbsp water per egg) and use coconut oil instead of vegetable oil. Use a plant‑based white chocolate alternative. The muffins stay just as moist, and you get a vegan‑friendly treat without compromising flavor.
Chocolate‑Swirl Surprise
Create a swirl by mixing a tablespoon of cocoa powder with a splash of milk, then dolloping it into the batter before folding in the white chocolate. You’ll get pockets of dark chocolate that contrast beautifully with the sweet white chocolate, offering a dual‑chocolate experience.
Storing and Bringing It Back to Life
Fridge Storage
Place the cooled muffins in an airtight container and store them in the refrigerator for up to five days. The moisture from the pumpkin helps them stay soft, but the container prevents them from absorbing other fridge odors. When you’re ready to eat, warm them in the microwave for 20‑30 seconds for a fresh‑out‑of‑the‑oven feel.
Freezer Friendly
Wrap each muffin individually in plastic wrap, then place them in a zip‑top freezer bag. They’ll keep for three months. To reheat, let them thaw at room temperature for 10 minutes, then microwave for 30 seconds, adding a splash of water to the plate to create steam. This method restores the soft crumb and melty chocolate.
Best Reheating Method
For the ultimate texture, reheat muffins in a pre‑heated 300°F (150°C) oven for 8‑10 minutes. This gentle heat revives the crust’s slight crispness while keeping the interior moist. If you’re in a hurry, the microwave trick works, but the oven method is the gold standard for texture lovers.