I was standing in a cramped kitchen, staring at a stack of soggy frozen waffles and a half‑finished omelet that had turned into a greasy pancake mess. The clock read 7:15 am, and my craving for something savory, yet sweet, was screaming louder than the alarm. I grabbed my phone, typed “breakfast poppers” into the search bar, and hit the link that would change my mornings forever. The recipe was simple, but the promise of a fluffy, bite‑sized breakfast that could double as a party starter made my taste buds dance. That moment, when the kitchen smelled of fresh batter and the sizzling sound of a hot pan, felt like a culinary revelation.
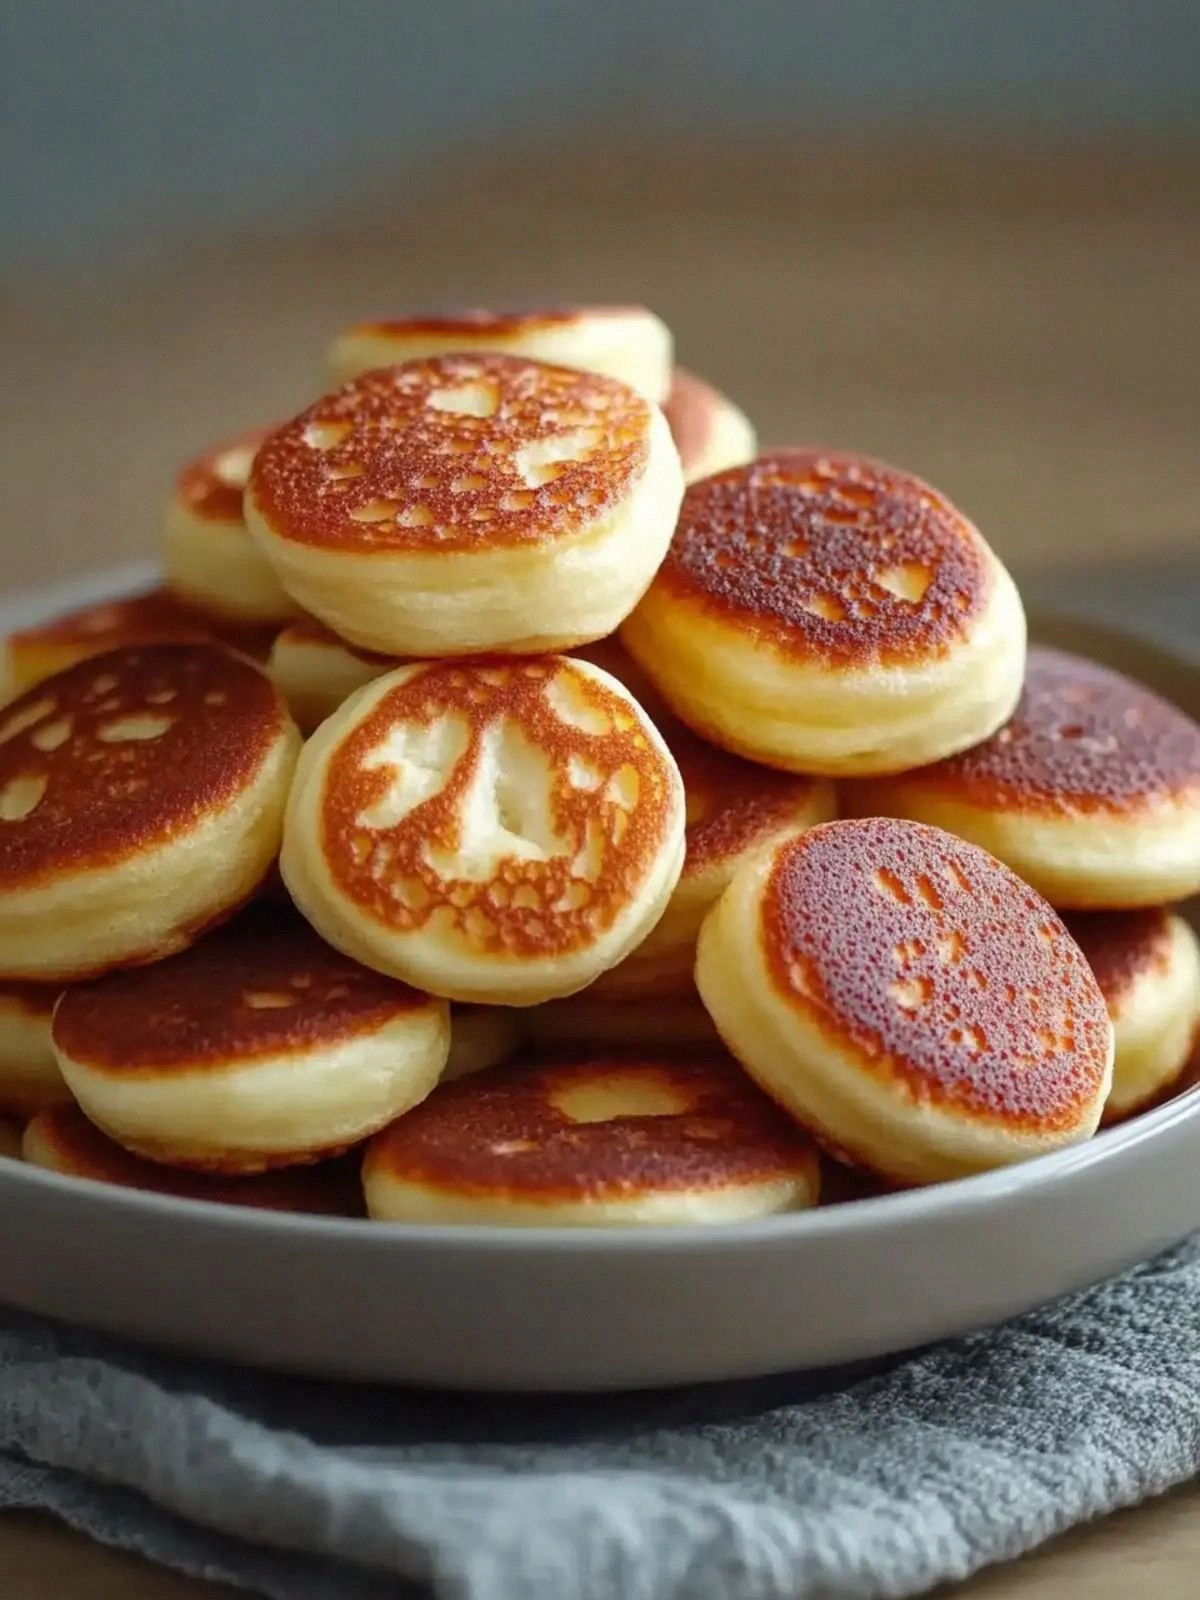
Picture this: a golden pancake popper, crisp on the outside, soft and buttery inside, with a hint of vanilla that lingers on the tongue. The aroma of freshly whisked eggs and butter rises, mingling with the sweet scent of sugar. The texture is a playful contrast—crisp edges that crackle like thin ice, and a tender center that melts in your mouth. The sound of the first bite is a satisfying pop, almost like opening a gift. The flavor profile is a harmonious blend of sweet and savory, a duet that sings against the backdrop of a bright morning.
What makes this version stand out? It’s not just the batter; it’s the technique that locks in moisture, the use of vanilla to add depth, and the decision to shape the pancakes into bite‑size poppers that can be served in a line or stacked like mini towers. I dare you to taste this and not go back for seconds. The result is hands down the best version you'll ever make at home, and it’s so easy that even a novice can master it. If you've ever struggled with pancake texture, you're not alone — and I've got the fix that turns every batch into a masterpiece.
Most recipes get this completely wrong by using too much flour or baking powder, which results in a dense, rubbery popper. Instead, I keep the batter thin, like a crepe, so it spreads evenly and cooks quickly. The secret lies in the ratio of wet to dry ingredients; the batter should pour like a thick smoothie, not a stiff paste. I add a splash of milk just before pouring to keep it silky. The result? A pancake that rises just enough to be fluffy, yet stays compact enough to hold its shape.
And here's the kicker: I fold in a pinch of sea salt at the very end, right before pouring, to elevate the flavor profile without overpowering the sweetness. The salt crystals break into tiny specks, giving a subtle crunch with each bite. The contrast between sweet and savory is so pronounced that it feels like a symphony on your palate. The final touch is a light dusting of powdered sugar, which adds a delicate sweetness that balances the savory edges.
Picture yourself pulling these out of the oven, the whole kitchen smelling incredible, and friends or family gathering around the table with curiosity. The moment the poppers hit the plate, the steam rises like a tiny cloud of anticipation. I can almost hear the delighted “Wow!” that follows. This is the kind of breakfast that turns a mundane routine into a celebratory event. And now, ready for the game‑changer, let me walk you through every single step — by the end, you'll wonder how you ever made it any other way.
What Makes This Version Stand Out
- Texture: The batter is thin enough to create a crisp exterior while retaining a tender interior. This balance eliminates the rubbery feel that plagues many pancake recipes. The result is a popper that crunches pleasantly before giving way to a soft core.
- Flavor: Vanilla extract is the unexpected star that adds depth, turning a simple pancake into a fragrant treat. The subtle sweetness is complemented by a pinch of sea salt, creating a savory-sweet harmony.
- Convenience: No elaborate prep; the batter is ready in 15 minutes, and the cooking time is a quick 30 minutes. This makes it a perfect breakfast for busy mornings or a last‑minute snack.
- Versatility: Serve them at brunch, as a party appetizer, or as a quick snack. Their bite‑size nature makes them ideal for sharing or for a single satisfying bite.
- Crowd Appeal: Friends who are skeptical about pancakes as an appetizer will be amazed by the poppers’ playful texture and flavor. They’re a hit on Instagram, too.
- Ingredient Quality: Using fresh eggs, real butter, and pure vanilla extract elevates the dish beyond a generic batter.
- Make‑Ahead Potential: The batter can be prepared ahead of time and stored in the refrigerator for up to 24 hours, making it a stress‑free option.
- Healthier Alternative: By reducing the amount of sugar and using whole‑meal flour, you can create a lighter version without sacrificing taste.
Alright, let's break down exactly what goes into this masterpiece...
Inside the Ingredient List
The Flavor Base
Vanilla Extract: This isn’t just a splash of sweetness; it’s the aromatic backbone that ties the batter together. A single teaspoon can transform the flavor profile from plain to gourmet. If you’re vegan, use a high‑quality plant‑based vanilla for the same effect.
Sugar: One tablespoon is all you need to add a gentle sweetness that doesn’t overwhelm the savory notes. Skipping sugar will yield a bland batter; too much will make the poppers cloying. A light dusting of powdered sugar after baking adds a finishing touch.
Salt: A quarter teaspoon of sea salt brings out the flavors without making the batter taste salty. If you prefer a lower sodium option, reduce to 1/8 teaspoon, but keep the pinch of salt in the final mix to maintain balance.
The Texture Crew
Flour: One cup of all‑purpose flour provides the structure needed for the poppers to hold their shape. Switching to whole‑meal flour adds a nutty flavor and a boost of fiber. However, keep the ratio the same to avoid a dry texture.
Egg: The single large egg binds the batter and contributes to the rise. If you’re vegan, a flax egg (1 tbsp flaxseed + 3 tbsp water) works as a substitute, but the texture will be slightly denser.
Melted Butter: Two tablespoons of melted butter adds richness and helps achieve a golden crust. Butter also prevents the batter from sticking to the pan, making flipping easier. A vegan butter alternative works, but the flavor profile may shift slightly.
The Unexpected Star
Baking Powder: One teaspoon of baking powder ensures a light rise without making the poppers too airy. Too much baking powder can cause a bitter aftertaste. If you’re on a low‑sodium diet, use a reduced‑sodium baking powder, but keep the amount the same.
The Final Flourish
Milk: Three‑quarters of a cup of milk hydrates the flour and creates a silky batter. Skipping milk will make the batter too thick, leading to uneven cooking. For a dairy‑free option, use almond or oat milk; just make sure it’s unsweetened to avoid altering the flavor.
Everything's prepped? Good. Let's get into the real action...
The Method — Step by Step
- In a medium bowl, whisk together the flour, sugar, baking powder, and salt until well combined. This dry mix forms the foundation of your batter. The whisking ensures an even distribution of leavening agents. Keep the mixture light; over‑mixing will develop gluten. When the dry ingredients are smooth, you’re ready for the wet components.
- In a separate bowl, beat the egg and then stir in the milk and melted butter. The egg provides structure, while the milk keeps the batter silky. The melted butter adds richness and helps create a crisp exterior. Whisk until the mixture is uniform and slightly frothy. This indicates that the fats have emulsified with the liquid.
- Pour the wet mixture into the dry ingredients and stir gently with a spatula. Aim for just‑combined batter; a few lumps are acceptable. Over‑mixing can lead to tough poppers. The batter should flow like a thick smoothie. This consistency is key for even cooking.
- Let the batter rest for 5 minutes at room temperature. This brief rest allows the flour to hydrate fully and the baking powder to activate. While the batter rests, preheat a non‑stick skillet or griddle over medium heat. A properly heated pan ensures a golden crust.
- The batter is now ready for pouring. Use a small ladle or a ¼ cup measuring cup to scoop the batter. This ensures each popper is the same size for even cooking. If you prefer larger poppers, increase the amount per pour accordingly.Watch Out: Avoid pouring the batter too hot; it can cause the edges to burn before the center cooks. Keep the heat at medium and test with a small drop of batter; it should sizzle gently.
- Pour a small amount of batter onto the skillet, forming a thin circle about 3 inches in diameter. The circle should be thin enough to cook quickly. The edges should start to lift within 30 seconds, indicating the right temperature. Flip the popper when bubbles form on the surface and the edges begin to set. This usually takes 2–3 minutes per side.
- Repeat the process with the remaining batter, stacking the cooked poppers on a plate. While the poppers cool, lightly dust them with powdered sugar. The sugar adds a subtle sweetness that enhances the savory undertone. This step is optional but highly recommended for an extra touch.
- Serve the poppers immediately while they’re still warm. Pair them with a side of fresh fruit, yogurt, or a savory dip like salsa or aioli. The contrast of flavors makes each bite a delightful experience. If you’re serving at a party, arrange them on a platter for an eye‑catching display. Enjoy!
Insider Tricks for Flawless Results
The Temperature Rule Nobody Follows
Many cooks assume that a high heat is necessary for a crisp exterior. In reality, medium heat allows the batter to set evenly without burning. Test the temperature by dropping a small droplet of batter onto the pan; if it sizzles and spreads slowly, you’re good. This method prevents the edges from becoming too hard while the center remains undercooked.
Why Your Nose Knows Best
Smell is a powerful indicator of doneness. When the poppers begin to smell toasted, you’re close to the ideal finish. A faint nutty aroma signals the caramelization of sugars, which adds depth to the flavor. Trust your nose, and you’ll avoid overcooking or undercooking.
The 5-Minute Rest That Changes Everything
Letting the poppers rest for 5 minutes after cooking allows the steam to redistribute, making the interior fluffier. This small step prevents the poppers from becoming soggy when they cool. During the rest, you can set a warm plate or a low oven to keep them warm.
The Secret of a Perfect Flip
Timing the flip is crucial. Flip when you see small bubbles forming on the surface and the edges begin to lift. Flipping too early results in a raw center; flipping too late can cause the popper to tear. Use a silicone spatula to flip gently, maintaining the shape.
The Magic of Light Dusting
A light dusting of powdered sugar after cooking adds a sweet finish that balances the savory notes. It also creates a subtle shine that makes the poppers look more appetizing. If you’re serving them cold, sprinkle a pinch of sea salt for an extra burst of flavor.
The Final Touch: A Splash of Milk
Just before reheating leftovers, add a splash of milk and stir. This helps rehydrate the batter and restores the silky texture. The milk also helps to prevent the poppers from drying out during reheating.
Creative Twists and Variations
This recipe is a playground. Here are some of my favorite ways to switch things up:
Cheesy Breakfast Poppers
Add shredded cheddar or mozzarella to the batter for a gooey center. The cheese melts as the poppers cook, creating a creamy texture that pairs wonderfully with a tangy salsa. Sprinkle extra cheese on top before flipping for a golden crust.
Herb‑Infused Popper
Fold in chopped fresh herbs like chives, parsley, or basil into the batter. The herbs add a fresh, aromatic note that elevates the flavor. Use a light hand to keep the batter from becoming too heavy.
Smoky Chipotle Twist
Stir in a teaspoon of chipotle powder or a splash of chipotle adobo sauce. The smoky heat pairs beautifully with the sweet vanilla undertones. Serve with a dollop of sour cream to balance the heat.
Sweet Apple Cinnamon Popper
Add finely diced apples and a pinch of cinnamon to the batter. The fruit’s natural sweetness complements the vanilla, while the cinnamon adds warmth. Bake until the apples are tender and the edges are golden.
Vegan Delight
Replace the egg with a flaxseed or chia egg, use plant‑based milk, and vegan butter. The batter remains light and fluffy, and the flavor profile stays consistent. This version is perfect for those who prefer plant‑based options.
Savory Breakfast Poppers
Omit the sugar and vanilla, and add diced ham, crumbled bacon, or sautéed spinach. The poppers become a hearty breakfast bite that can be served with a side of eggs or a fresh salad. The savory version is ideal for a brunch gathering.
Storing and Bringing It Back to Life
Fridge Storage
Cool the poppers completely before placing them in an airtight container. Store in the refrigerator for up to 3 days. The poppers retain their flavor and texture when kept cold. When ready to serve, reheat in a toaster oven or skillet.
Freezer Friendly
For longer storage, freeze the poppers in a single layer on a parchment‑lined tray. Once frozen, transfer them to a freezer bag. They can last up to 3 months in the freezer. Thaw overnight in the fridge before reheating.
Best Reheating Method
The best way to bring them back to life is to heat them in a skillet over medium heat with a splash of water. The water creates steam, rehydrating the interior while crisping the exterior. Flip once to ensure even heating. Serve hot for the best experience.